Sunday, December 27, 2009

Terra Forming Again

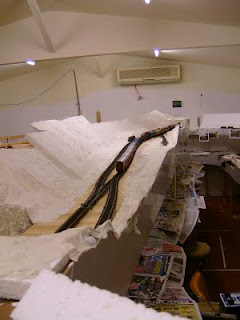
This weekend I have begun terra forming the area south of Fairy Hill Loop.  I plan to finish the initial layer of tissue soaked plaster over the next few days and may even have some basic scenery down in the form of dirt, sand and green scatter material by the time the guys come over for a running night on Tuesday.

While deciding the lay of the land of this area, so to speak, I have decided that I have room for three farm houses in the area I'm currently working on.  There will also be a country lane way that will go through the area that is just wide enough to fit one car on.  It will have dirt and gravel verges and will end with a level crossing protected by give way signs.


Basic foam shapes


Where the Lane will be

On Saturday I also spray painted two sets of Auscision Container flats, and a few other wagons I had laying around, some AR Kits Wheat Wagons and two scratchbuilt ballast wagons.  I even hit a shed I made back in May this year.  It is now ready to go on the layout somewhere. 

Sunday, December 20, 2009

Holidays

I must apologise for no post last Sunday.  I even got reprimanded over it yesterday while at the loco train shop - Hey Dave!  I just spent 6 days down the coast across the road from the beach at Burleigh Heads on the Gold Coast.  Great view, nice weather, not too hot and easy walk to the patrolled beach which was straight across the road.  Apart from the mobile phone ringing non stop and the hundreds of work emails I answered on my phone, I did not get around to check out the newsgroups, blogs and my private email all last week.  So that is the reason why there was no Blog update last Sunday.

Well while down the coast I spend a bit of time finishing off 6 NOCY wagons until I ran out of 0.030" x 0.040" styrene.  I picked up another packet on Saturday morning, so these wagons will have to wait until the Christmas break to be completed now.  I also roofed two little skillion roof signal boxes and I also put together a water tank from Casula and most of a nicely detailed wooden frame kit for the water tank to sit on.  I'm not sure where this kit will go, possibly Cassino Loco, as the water tank I need for The Risk is supposed to be on an iron underframe I think.  I should check the photos more closely!

Just before we went away, I spotted some Chiffon Wrap 18cm x 2m for $3.99 from a cheap shop.  I think this will make great HO fly screen for my houses and signal boxes.  I'msure its uses on the layout will be endless.  It is so much finer than the usual Tule we use for chain wire.

Saturday morning upon return from the Coast I also had to visit the Post Office to pick up our Club's order for Auscision CBQY, PRRY, and RQHY that Australia Post tried to deliver lastThursday while I was away.  My component of teh order was a set of PRRY and RQHY.  Boy is the detail fine!  I putthem on the track Saturday evening.  My concern is that the PRRY's emit a large amount of noise when going around curves.  The bogies, squeak and rub on the wagon end frames - Not happy Jan!  The RQHY's run much better.  All wagons roll fairly well on the straight, it's just the PRRY's don't like my 750mm curves where I just happened to put them on the track.  I might have to file the ends down slightly.  Not something I'd expect to occur on a modern wagon while on large radius curves.  Now if I had 18" curves fair enough!

I'd like to wish all my followers and readers of this Blog a Safe, Happy and Holy Christmas.  Have a great time with your family next Friday. See you again after the big fat fella leaves some Trains in your stocking next Sunday Night as usual.  In PK's case - he is the big fat fella wearing the stockings - couldn't resist mate!

Sunday, December 6, 2009

73 Class Loco

This weekend I barely got into the shed. Saturday I purchased my standard DCC decoder a NCE D13SRJ and saturday night I pulled my newly purchased second hand Bergs 73 Class Tuscan loco 7313 apart. After checking the internet on SPUDS, in fact Marcus Amman's website on putting a decoder into an X200 class and Josh Beveridge's site on the 73 Class, I removed the 2 spuds and pulled them apart. I then isolated the wheels pickups from the motor. I tested the isolation on DC with my trusty Kenbrite 12V controller.

On Sunday I installed the decoder, wired it up and gave it a further run on DC before setting the 4 digit code # to 7313 and giving it a run on my PowerCab controlled test track - and ran it back and forth. I currently have no white LED's at home, so could not fit headlights and cablights. I always install a cablight (or two if it is a double ended loco). The crew need to turn the cablights on when they enter a crossing loop so they can find their way out of the cab to change the staff at each unattended crossing loop.

The issue I have here is the front nose of the 73 Class is solid white metal. I'm going to have to drill a hole about 1/2" deep through the nose and put the LED in the cab somewhere.
Anyone fitted headlights to a 73 Class Loco before? If so, how did you do it?


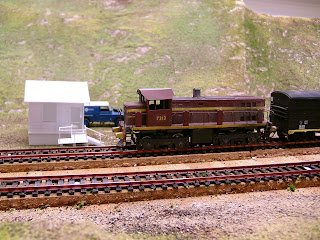
Photo of the 73 Class at Border Loop with the half finished Signal Box

I also added a few touches to Fairy Hill farm - a tyre swing for the youngster who live there.

Photo of the youngster having a swing on his tyre

It appears that the track crew has moved into Fairy Hill Loop. The rail train is in the siding. They have all stopped work waiting for a cross to occur.

Photo of Fairy Hill Loop showing the idle workers with Fairy Hill Farm in the distance

Sunday, November 29, 2009

The Risk Station Building

This week I spent some time putting together the Station building for The Risk Crossing Loop. This loop had a PC3 building. So instead of buying a kit, I scratch built it from sytrene. I blew up a plan to HO scale, and used some styrene sheet for the base and rear wall and 0.100" Novelty Siding (I think) for the front and sides. My collections of strip styrene got a work out for the detail items. The 0.100" Novelty comes out to near enough to 10" concrete planks. I even put in some internal walls, as well as the counter in the Station Master's Office.
As you can see these are currently without doors and windows. I still need to make the water tanks and downpipes.

Photo showing the internal walls

The completed building.
I also referred to Jim Hutchinson's excellent articles on building the PC1 and PC2 in Issues 269 and 272 of AMRM. I understand Jim has also built the PC3 but no article is yet forth coming. Jim also covers the colours to use in painting so I will hopefully purchase this this week.

I even built two platform facings out of the Novelty Siding and 2mm square styrene strip. One will of course be used for The Risk's Platform. I think I will invoke modeller's license to put the other at Rappville Loop. I have no idea what this loop had.
Don't think I will have much modelling time next week as I will be head down and other end up responding to a tender. I will have one days rest over the next two weeks, as the Tuesday Nighters are coming over this Tuesday.


Sunday, November 22, 2009

Signal Boxes

Today I show off a small amount of construction in styrene that has occured over the last 2 weeks. In the week leading up to last weekends Club visit, I completed the Fairy Hill Signal Box. Yesterday I attempted to paint it by hand. It's had its first coat and looks shocking. I will hopefully fix this with a second coat. I also have to paint the roof and install some internal detail like a pseudo staff machine and a few levers in it. It could also have a diagram up on the wall if people can get low enough to see in through the front window or door to see it.


Last night and today I put together the Border Loop Signal Box. While both the Fairy Hill and Border Loop signal boxes are the same model, they have different platforms out the front. I just need to install some sliding windows, that I'm thinking may be opening, the door, the screen door, and concrete block toilet, water tanks, and the wooden platform used by passengers. I also need to install the internal detail in this signal box as well.


Both signal boxes will eventually have LED's for internal lighting. I've certainly got lots of work ahead!


Sunday, November 15, 2009

Meeting Day

Well, the long awaiting meeting date came and went. I thought I'd given an overview on what occurred.

I had taken the last few days off work as I needed a break and I also needed to tidy up before the meeting. The Shed and the pergola both needed a clean. I got the track running on Thursday. There had been lots of glue from landscaping in a few area and trains were now runable from Grafton Yard to Acacia Ridge Yard and return. I was not going to use the Murwillumbah Branch. Off to school on Friday morning with the family and while there the wife got called up for tuckshop duty as they were short. So Kyle and myself swept and washed the pergold out and cleaned all the shairs, stoold and tables on Friday morning while thr boss was helping to feed the hungry hoards at school. On Saturday morning I vacuumed the shed to pick up all the Styrofoam and sawdust left over from terra forming and installing point actuators. I had an early lunch and just had to await for the arrivals.

At 1:00pm to thought noone is coming! But little by little the troops turned up. Everyone made their way down to the shed. Some had been here before, albeit 3 years and 9 months ago. Quite a lot has occurred in that time. Everyone made their way around the layout loooking at the various scenes and trying to follow the track to put things into perspective. The meeting started about 30 minutes late as most were happy to stay in the air-conditioned shed and just look around.

Eventually the reason for the gathering, our Club's formal monthly meeting got underway and the relevant business attended to. Well all except the financial business as the Treasurer was gallivanting around the Tasman on Holidays. It's easy to do this when you own a travel agency - I suppose. Once the meeting was over, we tucked into some afternoon tea put on by the better half, and we drew two raffle prizes in the Club raffle. One was a NSWGR GLV waqgon from OnTrack Models which was won by Greg. Matthew won the detail set of a couplr of scout tents etc. After the food started to dwindle, a few members started to leave to get back home - most had a 45min to 1 hour travel time back home. The rest adjourned back to the shed and a few then started to run trains, and take more photos. At least one member was having trouble with his American Steamer (with sound). It did not fit through one of the tunnels. His box cars had clearance of about 4mm under the bridge at Baker's Farm, and about 1mm under the road overbridge at Cassino's Barker Street. The loco also hit its head (funnel) inside one of the other concealed sections of track. The loco had a nice sound, but was just too big for the NSW loading gauge. Why would you model anything but NSW? While a number of people were running on the main, I decided to run the 620/720 from the dock at Cassino to Murwillumbah. My kids then wanted to help so they took turns running it in sections back to Lismore and then onto Cassino. It then did a shuttle back to Old Cassino and return to Cassino. I think everyone was impressed by the progress and had a laugh at some of the scenes.

For a few photos (I did not take any) go to Greg's Blog below:-
http://gregsshed.blogspot.com/2009/11/club-meeting-at-craigs-place.html

Today I went down to the shed and ran about a dozen trains from here to there and back again, staging a few crosses at various loops. I took the opportunity to fix up about 6 sets of low couplings and about 20 low KD trip pins. I also planted another tree and installed about 40 sets of toothbrush bristles (2 toothbrushes worth) in the relevant sidings that wagons could be left on, so they do not run away. Did I ever mention that not one bit of the layout is on the level. Everywhere has a gradient either up or down. I also found a few sets of bogies on a shelf and pressed a new 80' container wagon into service, as well as one extra scratchbuilt ballast wagon (built by Mike Boyde). I have another (MB) ballast wagon but I just need a pair of 2BP bogies first.

I also started by Christmas Modelling Competition entry. It is a small 6" x 6" diorama with by Fairy Hill Loop Signal Cabin temporarily mounted on it. The cabin just needs painting over the next 4 weeks when I decide to break out the compressor and spray gun. I won't be at the Modelling Competition but I will have an entry. On this date I will be at my daughter's Dance Concert and getting ready to to go down the coast that night or the next day. This year I might finish the 10 NOCY's that I started last year while on holidays. I just need to find the storage tray with all the half built bits on it.

Sunday, November 8, 2009

6 Days to go

It is 6 days until The Shed gets invaded by between 20 and 30 members from my Model Railway Club. They are this week getting innoculations so they can come travel from the north of Brisbane to the southside and have a rare meeting away from the Clubrooms. The guys last came over on the 12th February 2006. On that day it was hot, humid and it absolutely poured. That was in my pre-DCC days.

A photo from that very day is below. My daughter and son were clearly visible in the photo.


Since then the layout has been fitted with an NCE Powercab, then upgraded to an SB3 (which never gave me any trouble) and then to the full 5 AMP system.
This last tuesday I came home early from work before our Tuesday Nighter's Meeting and planted 42 trees on the layout. Since then I have planted about a dozen more and made up a few speed signs for the layout. Today I completed building the Fairy Hill Signal Box. It just needs windows and a door, painting and some internal detail, as well as internal lighting. I need another model of the same signal cabin for Border Loop. I don't think it will be ready by next Saturday.
Below some of the trees added
I have lots more speed signs and fence posts to create and install before the weekend. This Thursday I will give the good track a once over to ensure the layout is running properly. I might have to also check a few locos and their train consists. As it can be very embarrasing when the trains don't run, or they derail, or continually uncouple when the layout is on show.


Sunday, November 1, 2009

Buy and Sell Success

This Saturday I put together a few more give way sign posts for the layout and a few to sell at today's Buy and Sell and Clubroom open day. All in it was all a great open day. Lots of sellers, lots of visitors and I even sold some stuff. The bargain of the day was three Land Rovers and yellow Mini Van for $10.

On the layout facia at Border Loop, I have a copy of a photo taken of Border Loop signal box and in the rear of the photo is a Land Rover. I was planning on building the signal box and wanting to find a Land Rover to add to the scene. Talk about planets aligning! Also as I was planning a secluded place for the naturalists to visit and have a refreshing dip in Running Creek, these people have to get there somehow, and thus will need a four wheel drive to get there.


So landrover number two is accounted for. As I was also to model a rather disreputable character with binoculars spying on the ladies from the other side of the train tracks, he will need a car as well. What better than a Yellow Mini van. Of course the trees and shrubs have to be added yet.


The cars will need to be re-painted as they are very British in appearance.


I have also added a few more items to Fairy Hill farm, like a trailer, a Caravan, a shed for the washing tubs, the tubs, and a clothes line. Still lots more to do.


I also spent time today distressing a few sleepers so I can use them as old ones removed from the railway and used by the local Farmer for his vegie garden border.

If you still wanted proof, these photos are not as good as what my daughter took last weekend.

Sunday, October 25, 2009

A bit of Detail Added

This weekend I placed a bit of detail around Baker's Farm. It included the road crossing safety fence, some scratchbuilt road signs and railway crossing give way signs. I also placed a few cars around that were purchased by the Missus for $3.50 from K-Mart a few weeks back. They are all 1:87 scale as well. They were great bargains, but they only had 4.

I also added another railway crossing up in the Running Creek region. I also stuck up quite a few photos on the facia in a number of areas so when the Club visits in three weeks they can see photos of the real area and scenes I am trying to replicate.

The photos this week were taken by my 7 year old daughter as part of a school homework assignment using macro mode on the digital camera. They're better than mine - don't say anything PK!

Sunday, October 18, 2009

Quiet Weekend

Saturday of this weekend was not spent doing anything in the shed except put a number of new wagons on the track. Earlier I went round to Mike Boyde's House and helped him with his NCE Powercab DCC System. He had just put a new set of hand made points in and we fired up the Powercab - short. Me thinks it was the point. Yep we found two places were there was just a few threads of copper and rail still bridging where there should have been cuts. We fixed these but intermittently we had more shorts, so we disconnect the point altogether. So Mike is now operational with a DCC loco which I had installed a decoder into on the previous weekend. He was happy as a pig in .... - maybe we won't go there.

Many years ago Mike and I used to scratch build lots of wagons out of styrene. Mike was an expert in making MLE's and their many variants. Over the years I have acquired quite a few of these creations from sales off other friends as they rationalised their collections. Mike also scratch built many ballast wagons, ballast ploughs, concentrate wagons, 4 wheel coal wagons, BMT's, Nepean Milk wagons and many more. Mike used to ask me to proof read his instructions and I would make a wagon ot two along the way. Mike was my inspiration for getting into scratch building so many of my own wagons out of styrene, with just AR kits bogies and KD's being purchased. Mike Boyde is certainly a Master Wagon Builder and along with the inimitable Jim Hutchinson who is certainly the greatest house and structure builder i've seen, and knowing that I cannot attain their standards in their particular fields, although I dabble in both, I concentrate on the unusual, creating unique detail items like rocking ducks, picnic tables and picnic sheds, pallets, industrial bins, above ground pools, dunnies, and various sheds.

So on Saturday Mike offered me some of his scratchbuilt NSW wagons as he has moved to On16.5 scale. I was so humbled. They are absolutely rippers and in reality when you look at them you start wondering what brand of model kit or ready to run model are these? These scratchbuilt models will grace my layout with pride and will no doubt do many miles of running during future operating sessions.

I always remember one running night maybe 10 years ago on a Friday at the LDMRC clubrooms at Springwood. Mike was backing a string of bogie milk tankers into a siding at Brisbane Street Station - the terminus on the Club layout when we hear this noise and we all look over and Mike had about 6 BMT's in the dirt and they were at all different angles. I yelled out - "It's no use crying over spilt milk Mike" - and everyone around cracked up - two others from our Tuesday nighters group were also in attendance on that day - Darren Lee and Geoff Burns. That night's events still makes me laugh when I think about it. I expect that the pleasure will be repaid to me if the BMT's ever come off the rails in a future running session in the shed.

Today I spent an hour or two in the shed and did a bit more scenicing from Beaudesert Road Level crossing through Glenapp Loop to the beginning of The Risk Loop.

Sunday, October 11, 2009

Baker's Farm

Today started off in front of the TV watching the start of Bathurst. At the same time I was finally installing the decoder into my last 80 class loco. It just needs couplers and then this one can join the fleet on the layout. As an aside, last night I installed a decoder into my mate Mike's 0-4-2 narrow gauge steam engine as well. That is what game me the insentive the keep decodering today and complete my loco, as well as do somthing constructive while watching the first part of the great race - unfortunately Ford did not have a good day - particularly Tricky Dickie's Team.

I had planned to spend some time this weekend working on creating the farm on the left as we enter the door of the shed. This was what I was originally calling Rocla Farm due to its proximity to the Rocla Sleeper siding. Last Tuesday night with the learned minds of our Tuesday Nighter's in attendance in the shed providing words of wisdom (Oh I forgot PK was there too and that made up for the learned ones), we were discussing the correct layout of the farm. A farm is divided into paddocks. The house paddock where the house weas located, another for the main shed is and where the cars, tractors and other machinery would be parked etc. Then other paddocks for the main purpose of the farm - whatever that was. I am still a long way short of installing all the fences, but I thought I'd update you on progress.

Yesterday and today I spent some time spraying some Sentinal and Uneek fencing and gate products. First a primer and then for the front fence of what will now be called Baker's Farm. That is my wife's mother's maiden name and her family and there were a few that owned acerage next to one another at Slacks Creek may years ago. For the Brisbane locals this is right near where Moss Street is. So what better name to use for my farm.


Saturday, October 10, 2009

Problem Solved

About two months ago (if you go back through my posts) I installed a set of second hand insulfrog points in Border Loop to create a small run off - just like used to exist many years ago.

Above is scan of two photos taken by Darren Lee of Border Loop that shows this run off siding.

At some point in time after the installation of the point I eventually soldered the jumpers for the dead end siding so a DCC loco would still have power (for lights, sound etc.) if the points were set against it and it was locked away in the siding. But I had not run a loco on the layout since them. Last weekend before the Tuesday Nighters came over I fired up the layout and sure enough it had a short! Insert swear word of choice. What was the cause? Did I leave something on the track - a tool perhaps? Is something derailed? Did my ballasting at Fairy Hill Loop cause it? Nothing was obvious. The Tuesday Nighters could not see any trains running, but could see the scenic improvements I had made since their last visit.

Well late this afternoon in an attempt to humour myself. I just unsoldered one jumper wire around this newly installed (second hand insulfrog) point and the DCC system turned on. So I changed the point to the siding and the DCC system registered a short again. But is was an insulfrog! Well no doubt someone did some work underneath it and changed its function. Well, in went two insulated rail joiners and the jumper wire was re-soldered.

I then cleaned the track on the Main, the Loop and the siding, and ran a few locos back and forth.

Voila! QED!

Problem Solved! Back to doing work on the Farm near the Rocka Siding tomorrow.

Sunday, October 4, 2009

The Work Continues

A short update this week, as I have to also provide an update for the Club Magazine which is being put togather by PK tonight and I have been slack and not provided an update yet. I only spent a few hours this afternoon in the shed, while listening to the Toyota Cup Grand Final before coming up to the house to have a few soups and watch Melbourne win the Telstra Premiership. Well they did flog the Broncos last weekend, but they are full of Qlders, so I was barracking for them. However, I don't like their coach much as he is the coach of the cockroaches even though he was the Broncos assistant coach for many years.
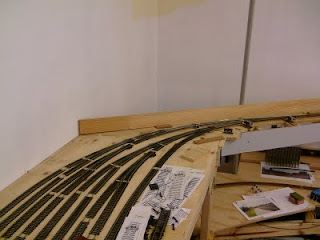
Well onto modelling. This weekend I finished the last locality (for some time), that I will be doing the basic scenicing on. This will allow some more detail to be added, like roads, road signs, fences, tents, a couple of houses and of course the windmill over the next month.

So today I completed the base scenicing of the southern approach to the Rocla Sleeper Siding, and at the northern end of the loop I have started on the rail crossing.


Southern Approach to the Rocla Sleeper Siding

This crossing at the northern end provides road access to the local farm, as well as the Rocla Sleeper Company Compound itself. It is also used by Maintenance of Way vehicles, who need to get access to the rail corridor to do what ever these guys do.

The rail crossing was going to be an Oz Kit single line level crossing. However, as my road is wider than allowed for in the kit and my road is also on a curve, I thought I would scratch build the necessary components needed instead and allocate the kit to somewhere on a straight piece of track that will look much better. I had some old wood stock similar to what was in the kit so I installed some check rails (using some code 80 track) and cut the wood to look like it would fit into the area. I then stained the wood in the crossing. I think I should give the bridge another coat while I'm at it as it has faided quite a lot - but isn't that the look we are after? I will use some code 55 rail for the sign posts and build about another dozen to be used around the layout. I will need to build the railway crossing signs and the give way sign out of styrene. I will also try and build some stop signs to go on some posts just to be different.


The Bridge and the rail crossing in question

The Tuesday Nighters are due over on this Tuesday so I expect to receive some comments on the progress made since their last visit.


Sunday, September 27, 2009

Progress Continues

I know a few of the Tuesday Nighters check here every Sunday night and are waiting for me to falter on my promise of a weekly update, so lets give them something to wait at least another week for!

Yesterday, I was working around the second tunnel portal on the layout north of Grafton and finally completed the plastering in this area. This is the start of the Rocla Sleeper Siding the first industry north of Grafton. A few short trains can load sleepers here -both the wooden and concrete varieties. All the sleeper carrying wagons bar one wooden sleeper wagon in use here are scratch built. That is 5 wooden sleeper wagons and 8 concrete sleeper wagons. You will notice in the photo below that there is a tunnel at the start of the siding as well as the track is covered by paper towel. Well in reality there is not a tunnel in that area - but modeller's license allows me to put one in here to lengthen the track distance between the staging at Grafton Yard and the first crossing loop north at Rappville. Rappville can be seen on the small shelf just visible (middle right) in the photo below.


The first bit of scenery that I started on the layout many months ago also moved closer towards completion today as I added a bit of greenery to an otherwise brown base. As previously mentioned a farm goes in here along with a windmill and water tank. A few cows will also be seen grazing the paddocks near the road into the Rocla Sleeper siding.

After the initial coat of scenery, I have also placed the road overbridge back onto the layout and with a road crossing staright off the bridge over the top track, will allow access for the locals to the farm and to the Rocla Sleeper establishment. Of course road signs, fencing, lots of trees, weeds, long grass, and telegraph lines will eventually detail this area as well.

Sunday, September 20, 2009

Little by Little

The earlier part of the week was spent gathering the various issues of magazines that show photos and plans of the station buildings and signal boxes at Border Loop, Fairy Hill and The Risk. The Risk had a 10" Concrete Slab Pc3 building and a Signal Box. I think the Signal Box was made from fibro. Border Loop and Fairy Hill also had 10" Concrete Slab Signal boxes. Plans are under way to complete these buildings over the next month or so. The walls have been cut out already. I just need to cut the door and windows in and assemble them with a roof and base.

I also installed point control in both Border Loop and Fairy Hill Loop. I use the piano wire controlled connected to the point and actuated by the old fashion push pull mechanism. The Border Loop points are operated from one side of the base board only, while the Fairy Hill Loop opoints are operable from both sides of the baseboard. For these I use some Modratec components. They are just great. This manual operation is to mimic the operation by the train driver or his offsider when entering the un-attended loops as per the North Coast on weekends back in the era that I model.


(Above is a Photo of Fairy Hill Farm, backing onto Fairy Hill Loop. To the front right of the shed you can see the sophisicated point control lever sticking out of the baseboard. You will also note that this farmer is well off as he has a boat in his shed and a roll of wire next to the shed, ready for when he installs his fence. - I think he is waiting for a working bee - Notice that the seat is up in the Dunny! And there is no paper left!)

I also bit the bullet and installed a very small trestle bridge under the railway line between the Running Creek Tunnels. This involved a bit of cutting of the track base board away, plastering of the creek opening, installing a couple of wooden trestles that I had lying around and Voila - The bridge over Running Creek is complete.

(Above the photo showing the Trestle and the currently dry creek bed)

I also finished the base scenery at Border Loop, and the section between Border Loop, past Running Creek to the first of the Running Creek Tunnels. I still have hundred of hours of super detailing to go.

(Above a photo of Border Loop completed except for ballasting, buildings and hundreds of trees)
(Above a photo looking north of Running Creek to one of the Running Creek Tunnels. This area will have a camping area for the local naturalists enjoying the vibrant waters of the creek as well as a few mountain climbers and train spotters - or are they?)

Sunday, September 13, 2009

Man the Pumps, All hands on Deck!

At the Train Club on Saturday afternoon it was confirmed that the Club will be visiting my place on Saturday 14th November for an away meeting. This is rare now-a-days as we do have our own purpose built clubrooms. Hmmm! I might need to do a tidy up. I might just have enough time. While the members have been following my Cassino Capers article each month in the Club Magazine - The Semaphore, I don't think many really appreciate the extent of 'The Shed'.


I will continue to go full throttle trying to get a lot of basic scenery down. But I will try and complete a few areas to a further level of completeness before the meeting. These more complete areas will be Rocla Farm, the area between the Running Creek Tunnels and Fairy Hill Loop. If my work of this afternoon is also any yardstick, I might even finish Border Loop.


In preparation for the big event (the meeting at my place) on Thursday afternoon I got the artline whiteboard marker out and hit the track at Fairy Hill Loop. As this area is visible from both sides of the peninsular, I needed to do both sides of the rail. On friday afternoon I checked it out and the pen had dried and the once shiny rail is now well rusted.


I then thought that I might put a bit of ballast on the main line through Fairy Hill. On Saturday morning before heading to two hobby shops and a Dick Smiths' on the way to the club on the other side of Brisbane (actually it is in Moreton Bay Regional Council outside of Brisbane), I put down a bit of ballast in the loop.


Today I put down some on the siding as well. So far I'm quite happy with my efforts to complete Fairy Hill Loop. I also started to throw around a bit of the detail items to see what it might look like. I will actually build another house for this farm, but the farm shed, the water tanks, the outhouse with the door open and lid up, and the fences will all be keepers.

Fairy Hill Farm


Last Sunday I purchased a few items, (i.e. wire and thread to be used as fence wire around Fairy Hill Farm). Yesterday I picked up some styrene sheet to build the signal cabin at Fairy Hill Loop. So with the deadline set I will need to spend time every weekend of the remaining 8 available to complete the scheduled work. I might even have to clean the track in preparation of running a train or two. So its all hands on deck!


Border Loop with a touch of green!


Sunday, September 6, 2009

Scenicing Solutions

The last few weekends I have been scenicing the area around my Fairy Hill Loop area. This involved putting polystyrene down, contouring it, and then throwing around a bit of plaster. As documented in this blog I went one further and also threw a fair bit of sand and dirt down and various shades of green scatter. If I don't say myself, I'm very happy with the results achieved. They will only get better as more detail is added.
So to answer a question posed to me, I will elaborate on how and what I did.
Normally I paint the ground a base colour and then sprinkle various tile grouts down to create the initial dirt layer so the white plaster does not shine through. However, friend of mine, Mike Boyde, gave me many packets of various colours of dirt and sand that he collected from the side of the road around the Toowoomba region a while back. So I thought I might give these a try. So I used the various black and brown soils then the creams and whites. Then over the top I used various types of scatters. The complete list is Testuff Scenimat Scenic Scatter, various Oz Flock colours - 101, 105 and 116. Some Heki Green Scatter and Woodland Scenics Fine Grasss T44. I prefer the really fine ground foam in preference to the hundred and thousand shape - elongated stuff. I also prefer the packets with all the same colour and not those that have a variety of colours in the same packet as they look very toy like. So to answer the question posed to me by Wayne Oliver, I start with the Yellow colour, and then mix the various shades of greens mid, light and dark. I just keep adding the various colours until it looks nice. Every now and again I spray over a mix of whiteglue and wet water from a spray bottle.

Side Note:- While in the shed yesterday with my two kids, I had to laugh as I had completed scattering the sand and soil around, I moved onto the yellow Oz Flock scatter on the other side of the tracks at Fairy Hill Loop when my 4-year old said to me, "That yellow is for dead grass isn't it Daddy?" It certainly was. Oh - the Joys of Model Railways!

Sunday, August 30, 2009

And on the 7th Day...!

The most difficult part of model railways in my oppinion is trying to emulate God. That is, trying to create a landscape like the big fella has done and make it look half reasonable and slightly believable. The first part of this process is what I call terra forming. Last weekend I finished the basic terra forming for the area around Fairy Hill Loop.
I use styrofoam and cut it down and shape it to get the basic contours and this was followed by the first coat of the plaster (half on Saturday and half on Sunday) over the styrofoam. As previously stated I use tissues dipped in plaster and lay this over the styrofoam.


After a visit to a mate's house this last Tuesday (for our fortnightly Tuesday Nighter's meeting) and just seeing the detail in his scenery I decided that I would try and bite the bullet and progress to the next step after terra forming and jump into creating the dirt and the grass in the latest section of scenery I had plastered. There are still a few more "creation" days left in the emulation excercise following this, with fences, bushes, trees, weed tufts, animals and man made junk, etc. to follow, but I thought I might share the results of this and last weekend's activity in the shed.

Sunday, August 23, 2009

Acacia Ridge Yard

This weekend I was planning to install my lower level automatic reversing module (AR1) but it still has not arrived at the shop. I was told Saturday that it should be here next weekend. I was also planning on installing a DS64 - a 4 point controller fron digitrax. I went to the shed early saturday morning after an ephifany on Friday night and worked out that I needed 2 of them - Bugger. They were also not in the shop. So that put a kybosh on my weekend plans.

Just to recap - I have one track fanning out into 9 tracks into what is Acacia Ridge Yard. Four are for arrivals and four for departures. Each track can store at least 3 trains nose to tail. The 9th track is between the arrival and departure tracks and allows access to the single ended storage sidings. I may as yet install some sort of run around on these tracks but that is a fair way off. It will also allow access to what I will call Locopilly. The opposite of Grafton Loco where I will store spare motive power at this end of the layout.


So I then had to think about how I was to manually control the 2 x DS64's and also where was I going to locate the control panel. The panel will be operated either by the driver when we only have a few in attendance at a running session, or by the main signaller. This person will control the setting of points for arrival and departure of both Grafton Yard and Acacia Ridge Yard. These are located above one another, each point in different directions.

I think I will have to re-read the DS64 manual over the next week to make sure I understand these things before I install them next week.

Sunday, August 16, 2009

Border Loop

This last weekend I have spent some time working on Border Loop. For many months I have run trains through here but the track had not been laid on cork. So this weekend I took the plunge and installed the cork. I also spliced in a left hand point that will be where the Mountain Goat will terminate. The Mountain Goat on my layout will be either a CPH (when it finally arrives - hopefully in September) or a 620/720 railmotor. I think in real life it was a 19 Class with a coach or two as well. This train ran from Casino to Border Loop taking kids to school in the mornings and in the afternoons, it took them back home.

I also drilled some holes under the points for the point actuators. This is just a piece of wire that protrudes through the facia. I also finished off the styrofoam base for the front of the Border Loop section. I had previously installed the styrofoam for the rear to similate the mountains at the rear of the track. These have been plastered over previously. I also poured a couple of buckets of tissue soaked plaster on Saturday and a couple on Sunday over the new styrofoam at the front of the tracks.

The first photo here shows the baseboard at Border Loop many months back before scenery was considered. This is looking north towards the Running Creek tunnels.


I have a couple of photos of the area behind the main and loop lines and the southern tunnel portal.


I also have one showing the newly completed plastering with a train cross occuring.


Sunday, August 9, 2009

Rejeuvenated

After 2 full days sitting on the door of our Club's Model Railway Exhibition (8th-9th August), I am about to turn a new leaf. I promise I will absolutely try and keep a weekly update to what has been occuring to Cassino. I will try to provide an update every Sunday night. I can't always promise that there will be photos accompanying the update, as I'm not a guru with the shutter, but I will try and provide updates that show off my progress.

I have been considerably slack in not updating this blog for approximately 2 months - My God - it has been three months I just checked!!!!. That does not mean I have not done anything. In reality I have gone through about 15Kg of plaster in that time and undertaken a considerable amount of terra-forming. I have done some initial landscaping in some huge areas of trackside real estate but I have absolutlely truck loads more to go. I have been able to impress the Tuesday Nighters last Tuesday Fortnight with progress from when they were last here so that is also encouraging. With so much area to scenic it is hard to work out where to start or what to do next. But what has been done - I'm mostly happy with. I will provide some photos next week.

For those who are really interested in finding out what has occurred in the construction of Cassino since its inception from a twinkle in my eye to reality, you can go through the pictorial journey from April 2005 until approximately March 2008. Just go to www.rmcq.mixedpk.com then go to [members layouts] on the left hand frame and then click on [Craigs Cassino Layout]. There are about 9 sets of photos on this page and then a link back to this blog. Enjoy!

Thursday, August 6, 2009

This Weekend

This weekend (8th and 9th August) the Railway Modellers' Club of Queensland Inc. will be holding an Exhibition north of Brisbane. The 2009 Pine Rivers Model Train and Hobby Expo will be at the Strathpine Community Centre 199 Gympie Road (enter off Mecklam Street). There will be 27 Exhibits covering a range of scales, outlines and non model trains. It is open from 9:00am - 5:00pm Saturday and 9:00am - 4:00pm Sunday. Costs are $5 for Adults, $4 for Consessions, $2 per kid, or the whole family (2 adults and all the kids) for $10.

I will be on the door most of the weekend so you guys in and around Brisbane, pop by and say hello.

Certainly cheaper than the Brisbane Exhibition which is also on this weekend.

Wednesday, May 6, 2009

Brisbane Model Railway Exhibition - May 2-4

Well, considering it has been about 5 weeks since my last update I thought I needed to add something. We have had a running session at Cassino, I've done a bit more scenery (just a bit), Acquired a few more points to lay to finish off the loops at Acacia Ridge Yard and I've spent three days at the Annual AMRA Brisbane Model Railway Show.
For three days I personed the Structure Building Exhibit with Master Modeller Jim Hutchinson. Well Jim was there for 2 days and on the Monday Geoff Burns from "The Eternal Beginner Blog" Fame substituted.

I spent most of my time on the weekend talking to the public, spending lots of money, annoying Werris at the Eureka Stand, and Oh yes, I did actually do some modelling. I also caught up with James McInerney.

Among other things, the building highlights of the weekend were - On the Saturday building a few outdoor dunnies. On the Sunday building a table and chair set. Monday I built a few sheds.

Below is some of the evidence.


Four HO scale folding chairs and a glass top outdoor table. They just happen to be sitting on a scratchbuilt NSW road overbridge that comes off my layout at home. The left white blur is an HO scale 3m2 industrial bin. The white blob on the right in an N scale version to keep the Club N scalers happy.


The HO scale Goods shed - not quote finished yet (yes the door opens). Also there is an old white metal car with a carton of XXXX Stubbies on the roof and a pallet of XXXX long necks in the tray. What a party this will be! Lucky there are some dunnies lined up at the top of the photo.

Sunday, March 29, 2009

The Scenery Begins

Last Tuesday the Tuesday Nighter's crew visited. I did receive some positive encouragement as to the progress thus far achieved. As promised last update, below is the photo on the area just past the Rocla Siding north of Grafton Yard heading towards Rappville loop and onto Cassino.


The bridge was scratch built by me about two years ago now at the Brisbane Model Railway Exhibition in May. The house is a Jim Hutchinson gift and the windmill is a brass model I purchased quite some years ago. Of course when this area is complete there will be fencing, driveways, sheds, cattle, railway access roads, a bit of greenery and a tree or two.

I also started working on a tunnel mouth near of the Running Creek Tunnels. This location is between Border Loop and the Risk Crossing Loop.


Only a few hours ago a decided to try and put some scenery in near Cassino. For quite some time, I have had some rather course chicken wire forming some base scenery outline. So I covered this with paper towel and then plaster soaked tissues. This is the Barker Street pedestrian crossing area that I intend to model. Left out of sight (to the south) is the Richmond River Bridge, while right (and north) is the Railway Avenue overbridge at Cassino.

The balsa wood is the what will become the bitumen road of Barker Street. I use a black/grey stain to achieve this. Below is a photo taken at this walkway many years ago looking south towards the Richmond River Bridge.

If you look north you see the overbridge.

This walkway is now closed.