Sunday, December 30, 2018

Lead up to and at the Operations Session


Wednesday dawned with me going to the shed and running the complete narrow gauge timetable.  This is 12 trains that ply the rails from Acacia Ridge Yard through Clapham Yard and sometimes reach Fisherman Islands Yard.  So my fleet of 4 locos and 17 wagons is not enough to run the timetable.  I actually need another loco and at least 4 grain wagons and then the first phase of my narrow gauge loco and rollingstock fleet will be complete.  The second phase of rollingstock expansion will include adding more coal and grain wagons, maybe 4 or 8 more of each along with a few different wagons.

I had an issue with the new dual gauge/standard gauge point for entry into Rocklea Sidings.  While all the standard gauge trains were working, the narrow gauge trains were not travelling through the point on the mainline.  I needed to add some isolation joiners around the point, and then feed the frog from a Peco switch connected to the point motor working this point.  I found a Peco switch lying around on the layout and soldered it up.  I jerry-rigged the dual gauge point, so that the narrow gauge track and the standard gauge frog all worked from this switch.  Testing revealed that the standard gauge track in both directions was again working, as was the narrow gauge traffic on the main line.  However, but putting the switch atop the point motor, the point no longer throws to the curve position (to access the sidings) each time I push the button.  However, it does restore to the mainline correctly.  

I think in the longer term, I need to acquire two auto DCC switching frog juicers (or a similar brand) piece of kit.  One will be deployed to the point at Rocklea Sidings, and another at the Fisherman Islands dual gauge point at the farthest end of the Yard.

So while running the narrow gauge rollingstock, I adjusted the coupling heights on a number of narrow gauge wagons to more correctly match the height gauge I have.  These adjustments made the trains run better, as it stopped some uncoupling events from occurring.  At the end of t\he day I still had another 4 trains to run to complete the timetable, which is what I did on Thursday.

On Friday night, I ran my track cleaning train from Grafton all the way to Murwillumbah.  On the way to Murwillumbah, I took the mainline, and on the way back to Cassino I took the loops where I could (when there were no trains in the way).  When back at Cassino, I then went north up the mainline all the way to South Brisbane Interstate, again taking the mainline all the way.  While at South Brisbane, I ran through the first 6 tracks at that location .  The other tracks have wagons stabled in them.  The track cleaning train then ran all the way back to Dutton Park, before taking a small detour back down the branch to Fisherman Islands.  From there the train returned all the way to Grafton.  While on the way, back, I ran through all the Loops.  It was this movement that caused me to noticed the track at Cassino Meatworks had a dead section, as did the northern end of Cassino Yard.  Another issue that developed, is that the point at Dutton Park, which directs trains to either Fisherman Islands branch or South Brisbane Interstate decided to not throw towards Fisherman Islands.  At least I could climb up the back of the layout and manually change that set of points if I needed to.  The set of points on the southern entry into Clapham Yard standard gauge track 3 would also not throw, so that was added to the "to be fixed" list for after the session.  So I could feel a big whoops occurring on Saturday!

Then on Saturday morning, I had previously forgotten to move 4 of the narrow gauge trains back into place to align the narrow gauge trains with the timetable start time.  So I went down and did this.  However, I was having issues.  I could not get trains to travel over my dual gauge point at Rocklea Sidings.  My Operations Session was not going to go well.

Saturday started off with the standard BBQ snags on a piece of bread, with onions, sauce and cheese.  Total crew was 11 attendees including me.  Of course drinks were available of various persuasions to keep the attendees cool.  I had a few new runners this time.  These guys got a quick overview before the crew took their places.  The aircon was turned on.  Everyone was handed a lanyard to attach their timetable cards to, and to provide a solid backing if they needed to write any notes onto the timetable card, so I can go through and correlate the issues and fix these following the session.  Greg started the Raspberry Pi for me and set the fast clock.  But I told him the incorrect time – Oh silly me!  He soon fixed this, and then Arthur assumed the position of North Coast Control.  The headsets were handed out and initially what seemed like dis-organised chaos, soon turned into a generally organised bedlam before settling down to a more sedate operating session.  We were able to get around all the issues of dead track.  Another dead track section popped up and this is over the Richmond River bridge just south of Cassino.  This regularly occurs.

There were a number of wagon issues.  One coupler jaw snapped on a stock train.  That wagon was placed in the back platform road at Cassino.  A low coupler was identified on a shunt train from Grafton to Murwillumbah and return.  A couple of trains were positioned wrongly at the start of the session and this caused some issues with trains not being able to exit staging due to something in front of them.  But we can move trains around to fix this and we did.

During the session, we had a few cases where shorts were detected.  We all knew who was causing them.  Don’t we?  Shelton could not remember that the last 4 digits of a loco was its address.  So while trying to address 44238, accidentally sent 4423 and its ballast train that was sitting in Fisherman Islands Yard careering into Loco Pilly.  I think he was trying to replicate the BHP run away in the Pilbara region from a couple of months ago.  A couple of other issues occurred, and we all thought they were caused by Shelton.  Upon further investigations, sure enough most were.  No one was killed, although an oil train ran into a car at a level crossing just outside the Rocla Sleeper Siding.  This has happened before.  The car sits on the road overbridge and the layout must have been bumped and the car ran to the railway track.  This shot featured on a couple of Facebook posts by session attendees.  Those running the layout via the JMRI wifi connection through my Raspberry Pi mostly ran out of power in their phones before the session was due to end.  So there was less and less trains running as we headed towards afternoon tea.  That is why I prefer to use the NCE Procab-R throttles, as the power lasts for about 12 months of use.  That includes all the times I fire up the layout and test it each weekend.

I think everyone had fun.  I wore the brunt of most of the jokes, as did Shelton.  But all was in jest.  I think close to 40 trains were run.  The timetable still has another 30 trains to complete its cycle.


After the Operations Session, I think I found 5 cans of drink that PK squirrelled away around the layout, and today I got stuck into the "to do list".  I fixed the three sections of dead track, Cassino Meatworks, Cassino Yard and the bridge over the Richmond River south of Cassino.  I fixed the stock wagon with broken couplers,  I adjusted the low coupler height on the MRC wagon.  I decided to attend to an issue I have had at Cassino Yard for quite some time.  The powered points at this location, were addressed as 1, 2, something unknown and 4.  They should have been 1, 2, 3, and 4 initially and then set to 424, 423, 422 and 421 respectively.  Well this has now been fixed.  I did discover that there is another set of point somewhere on the layout set to 4.  I'm not sure where, as it was at the other end of the layout that I could hear it throwing when I was working on Cassino Yard.  I will check this out tomorrow.  I ran one train twice yesterday.  So I had to "unrun" it today.  So I ran it in reverse to put it back.  I moved another two trains that were in the wrong locations at Grafton Yard to their correct locations.  More issues will be ticked off the to do list tomorrow.

Have a happy New Year everyone.

Some of the crew getting directions.

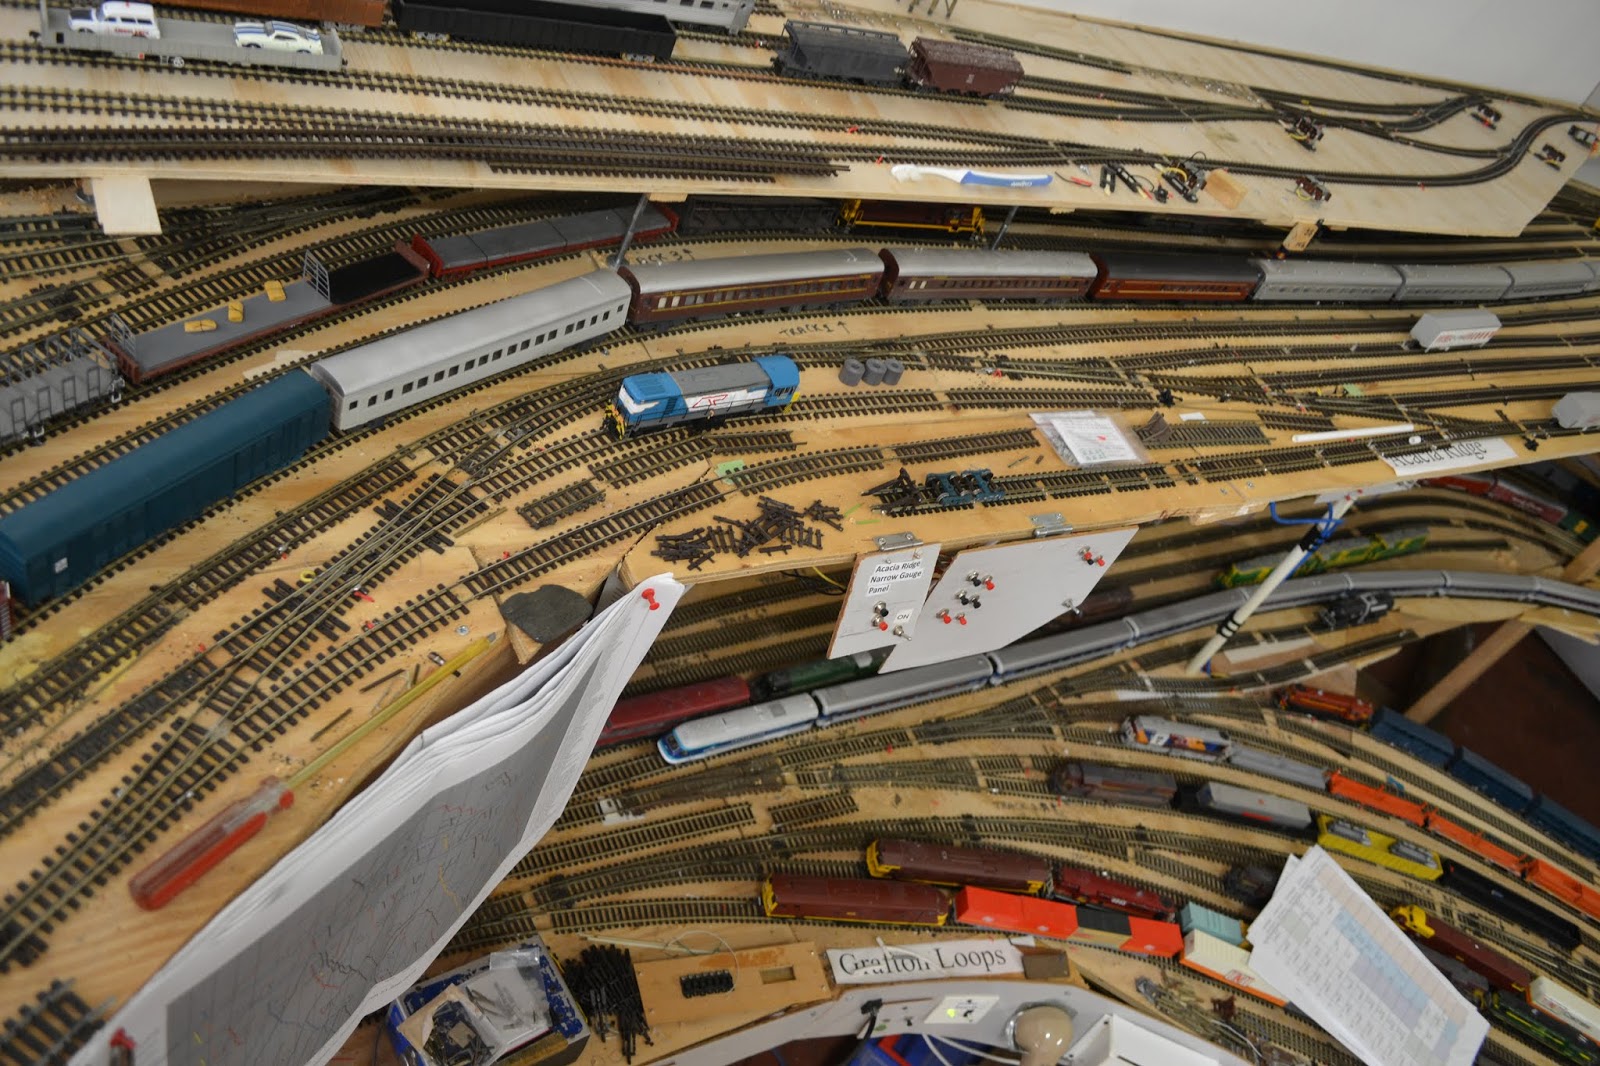
The Brisbane Limited at Acacia Ridge.  On the right of this is the dual gauge, then two narrow gauge loops.

Yours truly up doing something at Rocklea Sidings.

Darryl going to do something to Chris maybe.  Or was it Shelton?

Glenapp Loop.  The troublesome 44238 or was that 4423 or maybe 4238?

The car ran off the bridge into the oil train.

The boys in blue out to protect the public.

Roadworks here with an ambulance coming through.

All these photos have been provided by Shelton.  Thanks Mate.

Monday, December 24, 2018

I Couldn't be Happier, and Merry Christmas

So this morning I wired up the push buttons from the Fisherman Islands East Panel to the NCE Mini Panel.  The panel was then coded up with the various point control commands for each of the tracks and upon testing all worked well.  I also adjusted the Peco point motor connected on the narrow gauge track in Fisherman Islands branching from the main track into the new loop sidings at this location at the east end of the yard, and eventually got it working very well.  So that was the first lot of tasks marked off my To Do List.

Attention then turned to standard gauge point into Rocklea Sidings.  I manufactured a piano wire throw rod and connect it to a Peco point motor a few centres away out past the narrow gauge track.  I was having some trouble with the stand gauge point throwing to the main line.  I was trying everything but nothing worked in resolving the issue.  It threw to the curve position very well to allow trains into the Sidings, but would not restore to the main line.  Then it dawned on me that the Peco point motor adaptor base that my Peco point motor was sitting on has a spring in it, as did the point itself.  I usually just use a Peco point motor mounting plate for my point motors that are not mounted below the points.  These have no spring in them and I use my own styrene throw rod made out of 2mm styrene.  So I removed the adaptor base and replaced it with a standard Peco mounting plate with my own throw rod, and no second spring and the point now threw fantastically in both directions.  I was going to use the adaptor base, as the point I had planned on putting in that location was going to be a Tillig dual gauge point which does not have a spring like the Peco brand.  This I needed the spring in the adaptor base.  Now I have Success!  I even ran a standard gauge loco 7305 back and forth over the point in both directions and over both routes and everything was smooth as.  

A bit later I went for a trip down to Jaycar for some more wire (this time 3m of quad core alarm cable) and laid it between the NCE Mini Panel and the new control panel at the entry to Fisherman Islands for all the new narrow gauge loops.  The four cores are to carry the power and the signal from the three push buttons on the new pane.  That wire has not yet been soldered up as yet, but I think that will be done early tomorrow morning when I need to get out of the wife’s hair while she is cooking a great Christmas Roast in the kitchen.

So that brings me to the real reason of this blog update.  I would like to take the time to wish all my friends and all my blog readers a very Happy, Safe and Holy Christmas.  Spend some time with the family enjoying their company and lets hope that Santa has some room in his sack for some model railway related paraphernalia.  It seems he might for me.

Merry Christmas everyone.

Craig 

Sunday, December 23, 2018

More Work on the 400 Class Railmotor


This week I installed a D13SRJ decoder into the 400 Class Railmotor.  I also added pickups to the power bogie, by supergluing KD bronze centring spings to each end of power bogie and folding the side arms to rub on the wheels.  Pickup wires were then soldered to the springs and these were joined to the pickups from the other non power bogie for additional pick ups,  When I did a test by applying power to the wheels the motor ran.  So the railmotor was put on the track and given some DCC power and it started to run.  Or more correctly, the motor turned the wheels and the railmotor sort of just sat there.  I think it needs some additional weight over the bogie to help it keep its feet on the ground.  I might have to spend some time checking that the bogie is sitting squarely on all 4 wheels.  I have a feeling that it is not, and this is contributing to the wheel spin.

On Friday I visited Aurora Trains and picked up some 12mm points and track.  On Saturday I visited Austral Modelcraft and picked up some rail joiners and couple of other things.  Upon returning home, I installed the points and track at the eastern end of Fisherman Islands.  It wasn’t until today that I spliced in the points for the other end of Fisherman Islands so that trains can enter the two new run around sidings.  Sometime next year, I will add some intermediate crossovers into the narrow gauge tracks, maybe 1 or even 2 pairs of points.  These will be controlled by push pull piano wire.

I also wired up tracks jumpers to both ends of the new sidings.  This was followed by powering up the NCE QSnap which will control the 4 sets of Peco points (I only have three point motors at this point in time).  The three point motors were wired back the QSnap and the layout powered up and the point motors tested.  However upon testing, the throwing of the points from my handheld throttle, two of the points work very well, but the third, will not throw the point.  So tomorrow I will rip that point up and give it a clean in case some dirt or sawdust got into it when I was drilling holes for wires today.  I will then retest it.  I still have some more work in adding the wiring from the updated control panels for Fisherman Islands back to the NCE Mini panel, and then coding up the correct commands in the Mini Panel.

Tomorrow I will install the point motor ready to control the standard gauge track into Rocklea Sidings ready for my Operations Session next weekend.  On Christmas Day, as my present to myself, I will run trains on the layout in the morning, and I will commence various road trials of the layout.  All track will be run over by my track cleaning train.  Later in the week I will then check the headsets for communication back to North Coast Control, and the Raspberry Pi fired up and checked.

Sunday, December 16, 2018

Stephen Johnson Models 400 Class Railmotor


This last week I have been enjoying some time with the family down the Gold Coast with a beautiful view of the beach at Coolangatta and Greenmount.  The weather was very good, except for Thursday when the wind got up.  With Test cricket on the TV for many of the days and daily trips to the beach and the pool, I did not have much time to do much modelling.  We even had some visitors on a few days.  However, I did take some kits down to the unit to work on.  I decided to get my Stephen Johnson Models 400 Class railmotor out and have a good look at it.  It did not require much clean up.  This seems like a very good quality kit.  The four sides were glued together and the roof trial fitted.  The roof is made up of two end pieces and the main roof section.  These too were also glued together.  I will have to work out how I will secure the roof onto the model - maybe a screw up through the floor into the roof section.  So after this initial construction, I then put the thinking cap on as to how to power the railmotor.  I thought I might have had some sort of 4 wheel power bogie somewhere at home.

It was not until I came back from the coast that I searched the shed today and found out that one of the power bogies from an old loco was tried.  The locomotive, one of three provided to me by my father-in-law many years ago.  I could never sell them, so they have sat on the same siding in Grafton Yard for close to 10 years.  So one loco was disassembled, and the motor was tried out with a power supply.  It actually worked.  However, the power mechanism, had plastic wheels with traction tyres.  No that was never going to work.  So I pulled the bogie apart and remove the axel and took off the plastic wheels.  I then had to search the shed for suitable replacements.  Well I found some old Powerline 81 class drive wheels (I think) and the wheel were the same diameter as the Tyco ones.  You never know you luck in the big city, and the drive gear on the axel meshed with the trial train on the Tyco power bogie.  I applied power and everything turns.  So that is a big start.  

So this arvo, I built a styrene chassis out of some 0.080" styrene with some stiffeners to fit inside the 400 Class railmotor and the power bogie fits in and seems to have enough turn to seem confident that when I finally wire it up, it should be a viable mechanism for the railmotor.  The brass etch for the cow catchers were glued on and the model is starting to look pretty good. I also drilled a hole in the chassis for the power pickup bogie.  This was trial fitted this afternoon and maybe later tonight, or one night this week, I will solder the relevant wires to a spare NCE decoder I have sitting around in the shed and see if it works. 

It will then get a test run around the layout.  Next weekend I will look at how I can get this unit painted, then decaled.  I will then try and fit some headlights and maybe internal cab lighting.  It might just be my own Christmas present to myself.

Sunday, December 9, 2018

RMCQ Christmas Modelling Competition


So the week started with a delivery of my Southern Model Railways 2300 Class loco arriving in the mail on Monday.  On the same day I also received an order of ten push buttons from an Ebay seller.  Later during the week I also received another package from the postman for an NCE QSnap that I ordered from Sydney at a very good price.  

On Tuesday night we all went to Lefty’s place for our Tuesday Nighter's meeting and I showed off my 2300.  I had to take my own length of 12mm track (actually it was a Tillig dual gauge piece of track) and two alligator clips so I could power my narrow gauge track from his HO track.  Arthur had also received two 2300’s on Monday and he had posted a couple of photos on his blog on Monday.

I am particularly impressed with the horn on the 2300s.  I think it must be the best horn I have ever heard on a model.

Saturday was the date for our annual modelling competition at the Club.  There was a couple of very nice models in attendance.  There was a fantastic large scale wagon entered that had drop down sides.  The sides even had a locking pin that could be put through the catch.  Absolutely amazing.  There was also a very nice O scale train with advertising on the side.  I believe that the winning entry was the narrow gauge shay on the back of standard gauge wagon.  One member who had quite a few entries in the competition, could not turn up at the last minute.  But all up there was plenty of entries.

Below are a few shots of the entries.
The Innisfail Tramway Guards Van

Narrow gauge Shay

Small Diorama

Weathered NSW ballast wagon with a removable load.

Weathered NSW Paper Van.

Two QR narrow gauge graffitied and weathered coal wagons with removable load.

Weathered Narrow Gauge WHO with a load of wire bar.

Weathered NSW Banana wagon.

Weathered QR tautliner wagon.

Old O Scale Brisbane Tram

N Scale dump track.

58 Class Loco

Diorama with lots of Arduino controlled flashing lights.

Sunday, December 2, 2018

I'm in Trouble


Last Friday I received an email from Australia Post advising that my 2300 class loco from Southern Rail Models is due to arrive on Tuesday this week.  I also was advised that something which was ordered from another shop in Sydney was being posted out.  I ordered that item last Saturday and it was on the way on Friday.  So I can expect the postman to be busy next week at my place.  No official word as yet as to when my RUB set will appear, or my Railbus for that matter.

On Saturday I also attended the Beenleigh Model Railway Exhibition, and while there had a very productive time.  I ran into Simon from my local hobby shop, Simon Says Hobbies and Games.  He had a demo layout brought along to talk about accessory decoder control on the layout.  It created a lot of interest and I know of a few guys who did not know about his shop, will be heading over that way over the next few weeks for a look see.  George from Aurora Trains was also there with his shop.  He advised that the set of Tillig Dual gauge points on back order were on the water coming from overseas and should be here is a couple of weeks.  Hmmm.  Decision time, do I rip out what I had already installed, and relay everything with the Tillig track work.  I might investigate that next weekend when I’m on holidays.

There was also Col with his second hand shop doing what seemed like a roaring trade.  There was also Don from the northside, and Jim from J&J.  However, the main reason I went there was to pick up another 1720 loco and decoder from Adam at Wuiske Models for my 12mm track.  Shhh!  Don’t tell the wife.  I’ll be in the dog house – again.  I thought that I’d been pretty good lately and thought I deserved do give myself a present.  Once home, I took off the shell and installed the decoder.  All in well under 5 minutes.  Gave it a new DCC address and let it do a few runs up and down the track.  While I was in the mood, I took my other 1720 apart and rotated the decoder about in it.  Low and behold, the lights now work.  Some dork, namely me, installed the 8 pin decoder backwards.  At least both 1720 now work with lights and movement.  I just need to save up for next year’s May exhibition and pick up another 1720 class loco from Adam.

Last night I went down to the shed as there was nothing on TV and decided that today I would relay the entry into Rocklea Sidings.  This area was not giving me any confidence that it would continue to operate without issues.  So this morning, I went to the shed, put the Women’s T20 cricket on the TV, turned the fan on and went to work.  The baseboard was extended about 15 inches towards Clapham yard.  The track taken up, and the narrow gauge point into Rocklea Sidings was moved about 500mm towards Clapham Yard.  A Tillig third rail changing track, was installed in lieu of my home built one.  The track was then joined back up and the standard gauge trains tested from Clapham Yard to Rocklea Yard and also through on the mainline and in both directions.  I then tested a narrow gauge train from Clapham Yard to and from the Rocklea Sidings and on the mainline.  Again I just got a feeling that everything was running much better.  Now the point motor controlling entry into the narrow gauge sidings was moved and the wires controlling and powering it were extended.  All seem good with this change. The question still is, do I replace my doctored standard gauge point into Rocklea Siding or use the Tillig one that is on order.  Some more contemplation is required here. 
This shows the entry to Rocklea Sidings.  The left most point is the dual gauge track with a standard gauge entry to the yard.  The point on the right, is the narrow gauge entry to the yard.  Standard gauge and narrow gauge rollingstock is seen in the sidings.

The after shot,  The narrow gauge siding entry was moved about 500mm towards Clapham Yard.  Everything seems to run better through this area now.

After Lunch, I started working on a few tidy up tasks. I added weight to two of the calcium tankers in the standard gauge sidings in Rocklea Sidings.  One also had the traditional AR Kits bogie plug replaced with a screw.  I then found my half finished WOAX open wagon and added some decals to it.  I then added some weight to centre sill of two AR Kits NOCY wagons.  

Next Saturday is the Club’s modelling competition, and I have everything ready to take over to the shed.  I also have a plan to start getting some models to work on ready for my holidays later in December.  I think I’m going to work on the Cassino Station building, but also some Milk containers that I’ve had a couple of years wagons and not done anything with them.  So I need to get stuck into building these milk containers.  I also have a 400 Class railmotor kit, that I need to put together.  This might also get a start.  I intend that I will complete the two NOCY kits over the Christmas Holidays.  So these will be put together and painted and readied for maybe disposal at a Buy and Sell next year, if they can’t fit into my roster somewhere.

Sunday, November 25, 2018

Sidings and Yards


So Friday produced an early arvo from work, and so I went down to the shed and soldered the missing jumpers onto the rails near the points into the Rocklea Sidings area.  So no issues found, and the narrow gauge and standard gauge trains, ran back and forth good enough over the new track work.  But I must clean the standard gauge point.  I also found that my dual gauge crossing inside Rocklea Sidings was not working for the narrow gauge trains.  So I will put that onto the 'To Do' task list for later in the weekend.  One thing I did do though, was to adjust the height of an SDS Calcium Oxide wagon, which had a rather low coupling at one end.  So that is now fixed.  I also had some issues with the narrow gauge tracks in Acacia Ridge Yard seeming to being dead as well.  Another task for later in the weekend.

On Saturday I ordered another QSnap to allow me to power up the future narrow gauge points in Fisherman Islands Yard that I will install over my Christmas holidays.  I also ordered some push buttons and SPDT switches on evil bay for the control panels for these sets of points.  I realised that I need another Peco point motor to be purchased firstly, before I install the two extra narrow gauge sidings.  I was contemplating making the two narrow gauge sidings about 4 to 5 foot longer.  So that will require another 2 or 3 lengths of narrow gauge flex track to be put onto the shopping list as well.  I have already cut some extra ply lengths for the baseboard.  Again a task for the future.

I then had a bit of a clean up of my modelling desk and then installed a working incinerator onto my diorama module for the upcoming modelling competition in 2 weeks time at the Club.  A bit of extra vegetation will probably be installed next week to finalise this module.

Today I went down to the shed and sorted out the power feeds into Acacia Ridge Yard.  It seems that a lot of the power into this area, is via jumpers from track to track.  These are not fed via the track bus.  I had a track joiner feeding one rail and then the rest of the tracks in the yard fed off the first rail.  Not a very clever situation.  I will eventually rectify this, but I did fix up the dodge track fishplate and now power has been restored.  

Just before a small storm hit this arvo, I added the extra wood to the baseboard to allow lengthening of the two future narrow gauge sidings.  I also started installing the new control panel for the southern end of Fisherman Islands Yard that will control the new narrow gauge tracks.  The northern end of this yard, will be added to an existing panel a few meters up the peninsular.  

I will soon start printing out the photos that I have taken and collected of the Casino Station building, so my Cassino Station building can be kit based from three AMRI NSW station buildings.  I am hoping that these dismantled kits and some standard brick sheets will be enough to build a near enough replica.  I hope to really get stuck in over the Christmas break.  But I think it will take me most of the upcoming year to complete this model.

Sunday, November 18, 2018

Dual Gauge Point


This weekend we had a family Christmas Party complete with Santa arriving on a motorbike with presents on the Saturday afternoon/evening.  It was a great evening.  But before then I was able to get down to the shed and started putting my modelling competition entries together for 3 weeks time.  I found a few more items that I could enter into the competition.  The models I am entering are all sitting on the front two tracks of Acacia Ridge Yard.  I might do some little bits of titivating over the next two weekends as I await the get together at the Club.  I did do a few bits of weathering yesterday to enhance the models slightly.  I did a couple more bits again today, by adding some more weathering, this time to the roofs of the models.

I was also starting to think that I might have to start scratchbuilding a dual gauge point that I need for my standard gauge entry into Rocklea Sidings, as there seems to be no news about when the importer can source a left hand standard gauge point from Tillig.  This is very frustrating.  Either the Importer is incompetent or Tillig must be winding down their business.  It has been about 3 months now.  So yesterday I drew up some rough sketches of the dual gauge point I need, with the third rail on either side of the standard gauge through line.

I then went searching through my many bits and pieces of offcut points that I have in my scrap box.  I did find a couple of suitable samples that could be used for a basis of kitbashing these into a dual gauge point for Rocklea Sidings.

So today after lunch when I was just about to wander down to the shed and started looking at the dual gauge point, I searched another location in the study where I have some point building stuff stashed.  I found a broken left hand Peco medium radius point.  Hmmmm?  So I fixed this one up with styrene glue but mounting it on a styrene base, and then used super glue to keep the rails in the chairs.  I can't believe I still keep finding sets of points around - although partly broken.

Not more than one hour later, and I had a reasonable dual gauge point., and narrow gauge and standard gauge bogies ran through without problems.  So I then jumped up onto the top deck of the layout and removed the track and found out that the kitbashed point fitted in beautifully into the geometry.  So I then joined the track up to the standard gauge sidings.  I pushed three wagons through the trackwork quite a few times, and there were many issues.  So as I removed the old track, I think I moved the geometry into the existing narrow gauge sidings.  I then connected up the main line towards Acacia Ridge Yard and did a bit more testing on that route as well.  But after a lot more trial and error, and pushing various wagons through the trackwork, it now looks like the mainline works well for both narrow and standard gauge movements in both directions, and the two tracks into Rocklea Siding, the narrow gauge track and the standard gauge track also both work well.  

Well, I think I now no longer need the dual gauge point from Tillig.  So that is over $80 saved in my budget.  So that might bring forward the installation of the first extra siding in Fisherman Islands.  This will cost over $90 for the required track to install, and another $90 for more track for the second siding.  This could be a good job for the Christmas break.

However, next weekend, I will re-solder the feeders back on to the track around Rocklea Siding, after I removed four of them when removing the old trackwork, and then I will run both standard gauge and narrow gauge trains on the mainline in both directions via DCC, and then run trains into and out of the sidings.  I also have to install the point motor on the dual gauge point, and then that whole section of track will be complete.  Just 12 months ago, that section was not even a figment of my imagination.

Sunday, November 11, 2018

Inspiration and Then Weathering and Loads


On Tuesday night this week, we ventured over to Bob’s place for our regular meeting.  It was a good turn up and we were treated to some fantastic progress on Mosquito Creek.  This layout already had a very nice terminus section with some perway sidings and other industries already installed.  Last time we visited we got to see the fantastically scratch built bridge that spans over Mosquito Creek.  This bridge just looks like a typical Queensland Railways bridge that spans a flood plain where the bridge dips down in the middle.  When Bob runs a loco over it, even a very light QR Silver bullet (2000 class) Railmotor you can even hear the creaks and groans of the old timber beams under the weight of the train.

This visit was no exception with even more progress.  Holy Crap!  I have never seen mangroves modelled before.  The creek that leads past the wharf area, and which will be the main town location (most probably started on our next visit), then runs off into a small creek.  The mangroves along the banks of the creek were fantastic.  I could even small the mud at low tide.  I'm sure a saw a crab or two out of the corner of my eye.  It was one of the model brilliant modelling efforts of any sort of water way that I have ever seen.  I think all in attendance that night were just blown away.  Further up the creek, there is boat ramp and a small camping ground.  The detail is just phenomenal.  I think people were having night mares when thinking of the quality of Bob’s work.

I viewed this layout just when I could not get motivated to do anything down in the train shed except sit down and vegetate or maybe just walk around with a can of cold ale.  This inspirations visit to Bob's place, followed by hearing that I have an article in the next AMRM along with another Tuesday Nighter, and that started to get the modelling juices flowing again.  We then found out that Arthur had sent down an article about loads for open wagons and we have seen his finished product, that he is talking about.  More inspirations!

This Friday afternoon, I went down to the shed and decided to glue some coal dust onto three more styrene loads.  That was completed and that was it.  I think that was the sum of my modelling efforts for the whole week that I had a home following some surgery on Monday evening to remove a few BCCs around my face.  I did look like some horror movie character with the bandages on my face for a few days.  Now you can hardly see where the dissolvable stitches were placed.

Saturday was RMCQ meeting day.  I had a good time talking to my mates over there.  I have decided to run a modelling session in maybe February next year at the Club, where we will make various removable loads for either coal wagons or ballast wagons.  We could even do some wood chip wagons for the US modellers if they are interested.  Maybe we can do some Iron Ore loads, as I saw quite a few of these wagons running around on the Club layout yesterday.  I will call for expressions of interest and numbers of each type of wagon.  I will source all the products required and we will put them together on the day and attendees will pay just a couple of dollars for the expendables used for each wagon load.  We don’t care if the wagons are HO or N scale.  We will try and get the members into doing some actual modelling.  At the Club meeting, it was resolved that the Annual RMCQ Modelling competition will be on the Saturday in December.  While the RMCQ Christmas party will be on the Sunday.  So what this means is that I need to create a few items for the modelling competition.  So last night I started to make a list of potential items that I can create over the next month for the modelling competition.

So this arvo I went down to the shed and did some weathering.  Firstly I added some graffiti decals to two of my four narrow gauge coal wagons.  I then weathered all four narrow gauge coal wagons.  While at it, I decided to weather another four narrow gauge wagons.  I did this to one WHO open wagon, two taughtliners and one QLX louvre van.  I think they came up pretty well.  The next task for me was to try and make some 4x4 weathered timbers for stowing in my WHO wagons.  While at it, I decided to try and make some wire reo-bar loads for my open wagons.  I had a coil of 0.9mm galvanised wire in the shed, and then was laid out and pulled tight, and then wrapped around a couple of screws and then cut off into 5 bundles of 10 lengths of wire.  These were then bound with some other very fine wire that I had lying around.  They look quite nice sitting in two of my WHO wagons.

So I doesn’t take an Einstein to work out that I might be presenting a graffitied loaded coal wagon or two, a few more weathered narrow gauge wagons, maybe another wagon with a load of reo-bar in it.  Still plenty to do to complete these models.

Sunday, November 4, 2018

Still Talking Clothes Lines


On Thursday the call went out that there was a modelling night at Simon’s Shop on Friday night, and as Geoff was going as well as Darren, I mad it a trio.  It was good to catch up with the regulars and Simon on Friday night.  My night was also productive.  During the night, I put together 10 HO model clothes lines.  Well almost, I was missing a length of 1.6mm styrene rod.  That was picked up on Saturday morning and then cut up in the arvo.  The poles were glued together, winders added and then set aside and allowed to dry and then the spray can was used to paint the 10 clothes lines, as well as the four others that I already had assembled.  The rest of the afternoon, was spent getting out the items I was wishing to sell today at our Club's Buy and Sell and packing the car.

Also during the week, there was much talk (maybe more correctly termed friendly banter) online with PK and of course the opportunity was not lost on stirring him about his lack of action in installing his outdoor clothes line, so he can vacate his shed, so it can then be lined, and then become his train shed.  At the moment the Shed is just a big enclosed dryer with his clothes line inside it.  Come on PK, get a move in.  At least his washing will always dry and never get wet when it rains outside.

Today I rocked up at Dave’s place early, and we made our way to the Clubrooms for set up at the Buy and Sell.  I had pre-booked my table and I was next to Darryl, and down the road from past member Peter and Patty.  The selling was very slow, but I did end up quite a bit in the bank by pack up time.  However, I just cannot get anyone interested in my NSW rollingstock, - ballast wagons, sleeper carrying wagons, wheat wagons, open wagons, cement wagons and louvres, as well as the odd loco, XPT and various other bits and pieces.

One of the reasons I went to the club besides trying to sell some stuff, was to do a transaction on buying an old 12mm double slip.  I picked it up for a good price but upon closer inspection, someone removed the Peco springs.  Bugger!  But on the way home, I stopped in at David’s, ventured to his shed and did some consulting services.  After that I asked if he had any broken points with springs still in them.  Well he had some points, and when I got home, I removed the springs and eventually got the springs back into the 12mm double slips.  The point was then installed into Acacia Ridge yard and it works just like a bought one.

So that was another item ticked off my to do list.

It seems that the Club Christmas Party Meeting is now scheduled for a Sunday and I have other plans so I can’t make it (or so I'm told).  Another Bugger.  So that means that I will not have anything in the modelling comp this year.  I have a couple of items ready, and was planning on making something else, but it looks like I don’t have to now.

Earlier on in the week, we went to my daughter’s School Awards Night.  She picked up 5 subject awards for top marks in those subjects, a couple of perpetual trophies and then rounded it off my being announced as Co-School Captain for next year.  Not a bad night and of course we are very proud of her achievements.

Sunday, October 28, 2018

Slow Weekend Again


Well today I spent the day at a family Christening.  It was nice to catch up with the family.  Today would also have been my mother’s 100th Birthday, if she was still alive, so what better day to have a family catchup.

Yesterday I decided to sit at the kitchen table while the wife was off doing stuff like attending a linen party and then taking my daughter to a Halloween Party.  I revisited my 7 coal loads that I made the Friday a week ago.  I decided to build a shaped top on the load to help them look more like the modern coal loads that are nicely manicured to ensure that the wind over the top of the wagon does not dislodge the load that much.  So I made various shapes of load tops out of styrene and then glued these to the top of the existing load.  These were shaped with a bastard file.  The next step was to paint the loads with a spray can of matt black - a one minute job.

I also painted the two ballast loads inserts a matt black base colour as well.  While this was still wet, I sprinkled some Ardglen ballast onto the top of the loads and then wet this with some wet water.  I then dosed the wagon load tops with a mixture of diluted white glue and allowed it to set.

Late this afternoon I went down to the shed and observed that the two ballast loads look great.  The load is well set and the load can be inserted and extracted from the ballast wagons very easily with a magnet.  I just need to put these two wagons onto the layout somewhere.  I then decided that I would pour some glue onto three of the coal loads and then sprinkled some coal onto the tops to form the loads.  More glue was dropped onto the tops and then more coal.  These have now been set aside to dry.  On my next trip to the shed during the week they will be inspected and tested as well.  I will then do the same to the remaining four coal load bases.

I tried to take some photos today but the camera battery was flat.  So it is on charge, as my daughter's awards night is on this week, so I need to make sure I can grab some photos at that event.  We find out who out of her friends are going to fill the 10 leadership positions at the school for next year.  Finger's crossed for my daughter and her preferred position.

This coming Sunday is our Club’s Buy and Sell at our Clubrooms.  I hope to be taking some HO scale NSW rollingstock that is excess to my needs over there in the hope of selling. it  I will also have a few styrene detail parts like clotheslines, container flats, and generators on 20' container bases for refrigerator containers on trains for sale.  You never know your luck in a big city.

Sunday, October 21, 2018

Recovery Weekend


This week I was invited over to Brendan’s place for a Friday Night Modelling group BBQ.  It was very nice to catch up with Brendan, Darren and Geoff.  We also had Jeff visit as well.  Basically it was a night of discussions about Brendan’s new VR layout which is starting to come along very well.  We then adjourned to the modelling table.  Last Sunday I visited Bunnings and picked up a packet of steel washers.  I superglue two of these  washer to what becomes the underside of a sheet of styrene which is the basis of a load that I am putting together for two more NSW ballast wagons and 4 QR coal wagons.  I have so far made 7 bases for coal wagons.  While one of the coal wagon bases is basically finished so that the load can nestle into the wagon among the various ribs on the inside of the wagons, the other 6 have been just cut to length and width.  The cut outs for the ribs will occur most probably next weekend.  To remove the loads, I just hold a magnet over the washer and whole load gets extracted from the wagon.  The reason for this is so I can run loaded and full wagons on the layout as part of my operations.  The crew just load or unload the wagon at the appropriate locations on the layout.

This weekend, I spent quite a lot of time sitting in front of the TV just watching the V8 racing.  Not really doing any modelling on Saturday or Sunday.

In two weeks time, I will pick up the next piece of track I need for Acacia Ridge Yard – a 12mm double slip.  I noticed that the local hobby shop had one on Saturday when I visited.  Two weeks ago he did not have any.  Mine however will be second hand and at a fair price.  While at the Hobby Shop, I picked up a spare paint display rack, that he was disposing of.  Wouldn’t you know it, following assembly yesterday and stocking it up today, mine is now almost full.  It is amazing how much stuff one collects over time.  Now to clear some bench space so I can install it on top of one of my kitchen benches in the Shed.

Sunday, October 14, 2018

Modelling the Railways of Queensland Convention 2018


Yesterday was the 2018 Modelling the Railways of QLD Convention, held at the Beenleigh Events Centre.  While this facility was not cheap to hire, I think it provided a nice dry location to bring together about 80 modellers together to listen, chat, learn, and hopefully buy some models or detail items from the various trade stands in attendance.

I rocked up pretty early as I was one of the organising committee and shared an exhibition table with PK.  We soon blew out to two tables.  PK had 6 dioramas to show off and I had two with a third under wraps until just before my presentation.  PK’s dioramas show how to create the layers of ply, foam or other items like chicken wire, fly screen or cardboard to then cover with plaster or other similar items.  These are then painted and completed with dirts and scatters to then be super detailed.  The dioramas are meant for the attendees to see on a small scale what they can do on their layouts  on a much larger scale.

I did a session later in the day about “Bringing a Layout to Life”.  I provided some of my tricks and techniques as well as to an insight into what I try to achieve on my layout to bring it to life.

Throughout the day, there were some very good presentations.  I went to Anthony and Mark’s session on “Adding Purpose to Your Layout”.  It basically covered making your feel you were back in the era that railway was designed for and you were doing that work.  It was great.  I also listened to the session by Anthony Veness on his Dagun layout.  Again a very nice session.  Of course Arthur Hayes did a great session on the O wagons of Queensland Rail.  The day was completed with Marty talking about Animations. This too was very interesting and has prompted me to do some more research into Arduinos and how I can use them for a couple of tasks on my layout.

The feedback so far has been extremely positive.
Here are a few photos of my detailed diorama.

A few sheep have wandered into this shot.  Maybe they are on the lookout for a mutton bird in one of the trees.

This photo shows the small rock filled creek.  There is water in it which is keeping the small weeping willows alive in a rather barren scene.

Today, all I have done is unpack the car and put everything away.  I spent some time working out what the next project is and it will be making some loads for a mixture of wagons on the layout.  This will include 12mm QR Coal wagons and a couple of NSW ballast wagons.  Of course these loads will be built on a styrene base with a couple of washers superglued underneath so that the loads can be removed with a magnet in ones hands.  However, I don’t think I have any coal dust to use for the coal wagon loads.

The next major project will be to start building the station building for the Cassino platform.  I think this will be a mammoth task and take me well into next year to complete.

Sunday, October 7, 2018

Layout Tidy Up and Convention Preparation


With Monday being a public holiday, I spent most of the day in the Shed.  Most of that time was spent wiring jumpers to sections of the track and continuing the feeding of 10 wires from Clapham Yard to Acacia Ridge Yard.  These wires are for the Rocklea Sidings control panel and continue all the way back to an NCE Mini Panel underneath Loco Pilly.

The Mini Panel was coded up with the various commands to throw the particular points when the various switches on the panel were pushed, and it all works well.  I am still waiting for a Tillig LH Standard Gauge point to be brought into the country.  This piece of track is currently unavailable worldwide.  When this track segment arrives, I will then wire up a point motor to that set of points, and then also spend some time with one set of points where the point motor catches when it is thrown in one direction.  I think I have to replace the point motor base.  It only works in one direction at the moment.

The dual gauge sections of track in Clapham Yard that were added over the last weekend, had wire jumpers added around the Peco points and a few nails inserted into the track to align everything.  Both a standard gauge loco and narrow gauge loco run quite well over the new trackwork.  I also added two wire jumpers to Acacia Ridge Narrow Gauge Yard.  These two new sidings work well.  However, I have had a catastrophic failure of the rest of the dead end sidings.  I think I may have had a wire come loose under the layout.  But as yet, I have not stuck my head underneath to investigate.

This phot is of Clapham Yard.  This yard is a mixture of 16.5mm and 12mm track and includes a crossover of gauges and a section of dual gauge.

This scene shows the work done last weekend to provide a few more sidings in the narrow gauge yard at Acacia Ridge.  The 1720 is sitting on the loco siding, which will allow trains to move from the runaround sidings on the left to the deadend sidings on the right.

This photo shows the new standard gauge points between the 4th track from the left (the dual gauge) to the third track from the left.

This is Fisherman Islands Yard.  The baseboard has been extended at the rear to allow two more narrow gauge loops to be installed.  These will be short compared to the length of the sidings in the existing yard.

This weekend has been spent working on my notes for the Modelling the Railways of Queensland Convention next weekend.  These notes were started some time ago, and now they have finally been completed.  The last task was to supplement the notes with photographic examples from my layout to demonstrate my presentation.  My Powerpoint presentation was also sent off to the conference convenor yesterday although it has been basically completed for the last two weeks.   All that is left to do is to pack up my models for my presentation and have fun next weekend.  

I did find some time on Saturday to head over to Aurora Trains and picked up a three pack on SDS NPAX calcium wagons.  Two are for me and one for a mate, well it was PK.  I should be also paying for a 4 wagon set of Coal Wagons on Tuesday Night thanks to PK. The other thing that I did today was watch the Bathurst race.  Unfortunately Tricky Dickie’s team only came 3rd.  That was at least a podium finish.

I think over the next week I will try and make another half a dozen clotheslines so I will have some available next weekend in case some of the Convention attendees are after one. 

Tuesday night this week is at Dr. Peter’s place.  It has been a while since we have been there and I understand that he has done quite a bit of work lately.  So I’m looking forward to that.

Sunday, September 30, 2018

Still Working on the Narrow Gauge


On Friday evening I went down to the shed and did some thinking.  Well actually I ran a train.  I progressed one train (the Brisbane Limited) two staff sections and it is now sitting in Acacia Ridge Yard.  I then checked the next 3 timetable cards to take, and they all started at 8:55am or 9:00am.  The three trains on the layout were all at their 9:00 or 9:05 location, so the timetable is ready to be restarted at 9:00am.

Then I returned to this thinking thing.  I was considering how I could incorporate a 12mm loco siding into Acacia Ridge Yard.  After a few minutes I thought I would extend the baseboard by a small piece of wood about 100mm x 350mm to fill in a section.  By doing this I could put a siding in.  I thought some more and then I came to the conclusion, if I put a double slip in where a set of points already exists, I’d have more flexibility and two tracks will have direct access to this new loco siding.  I then worked out that if I replaced another set of points at the dead end section of the yard at Acacia Ridge, with another set of Double slip points, then I could continue the trackage from the first double slip to this new one.  This also has the advantage that I can replace a rather dodgy 12mm set of points - unknown brand.  This points have no inbuilt spring like the Peco points.

So on Saturday I hit the loco hobby shops.  I picked up a set of double slip points from Ray's Austral Modelcraft and installed it when I got home.  I also cut the extra bit of baseboard for Acacia Ridge Yard.  I then cut off two strip of 100mm baseboard that were joined length wise and this has been added onto the back of Fisherman Islands Yard.  This will allow two small loops to be added at this location, increasing the number of 12mm tracks.  

So I think I now have my list of 12mm track that I need to procure to complete my track laying process on Cassino.  It is still about four hundred dollars worth but next year around the May exhibition in Brisbane will be when I buy the final purchase of the track.  The Monday of that weekend will be a long weekend, and as such that will be the day that it will all be laid.  I just need to save up.

During the week, I had a bit of success.  It turned out that PK was willing to part with 4 QR coal wagons, so this transaction will be the start of my narrow gauge coal train.  I just need another 4 wagons and this train will be complete.  I then need about 6-8 grain wagons for my grain train and then at least another 3 WHO wagons for open wagons.  Then I think my whole 12mm rollingstock collection will be complete except for two more 1720 locos that I want to buy and, yes, the soon to be delivered 2300/2400 locos.

Monday this week was a day off for me, as my layout was open for visiting as part of the 2018 NMRA convention on the Gold Coast.  I had about 10 people come through.  I was ably helped by Lefty on the day.  This same day I added three extra QLink Tautliners to my layout as I bought them off John.  So I think I have a nice number of wagons now.  Who knows what else will come onto the market that will mean that I need to buy some more, but I’m happy at the moment.

Today I hot the shed while I had the TV on for the Women's Grant Final and the InTrust Interstate match.  I decided to run two trains that were not run during the open days last weekend.  This was numbers 19 and 19A, a local train from Grafton Yard to Acacia Ridge Yard and then Clapham Yard and then onto South Brisbane Interstate Yard.  I then worked out that while the timetable had two shunt trains in it, my timetable cards were missing two shunt trains from Clapham Yard to Rocklea Siding.  I will fix that this week.  But while thinking about working this train Number 68 and Number 69, I worked out that I needed another set of points from my dual gauge track in Clapham Yard to the standard gauge track 3.  So I found two left hand small radius points and installed then.   One was bit-bashed into a dual gauge point, with the narrow gauge going straight through only.  I still have to make one more Dremel cut in one rail and then wire these up tracks back up, as I'm sure I have disruptive the various power circuits with the various insulated joiners I have installed.  I will get stuck into this tomorrow, as well as test powered locos through these newly modified sections of track.