This week has been a slow week. Not much Modelling activity was undertaken. On Wednesday I
ventured over to the club and raised a few eyebrows when I walked in
mid-week. I picked up a couple of decoders, that I should have done on
Saturday. I watched some trains running on the HO Clubroom layout, some trains running on the HO/HOn 3½ exhibition layout for a shakedown before an upcoming
exhibition and also people working on the new HO/HOn 3½ Clubroom Layout.
I got the decoder tester our to check out the old decoder that I first put into
my DH model. I could not get it to talk.
I came home and did some work in the shed. On
Thursday, a new beer fridge was being delivered in the afternoon. So I
had to get the old one out and I put it in the pergola for the fridge deliverers to
take away. I drafted the apprentice to help me get it up the stairs out of the shed. I also had to remove the shelf that was above the old fridge as the new
fridge was about 2cm higher. Bugger. Anyway that was easily
done. PK sent me a message on Wednesday arvo, saying that the decoder I was testing earlier at the Club, was indeed beyond repair – as I thought.
Thursday dawned and the first course of business was the predicted delivery of the Auscision DEB set. It rocked up at about midday. It was
unpacked, and taken to the shed. The carriages were electrically
connected and the set put on the track in Grafton Yard. The sound was activated, the horn
tested and it was run from Grafton Yard and got to Cassino where it stabled in
the yard. I needed lunch. I will have to work out if I need to set
up a fake consist so I can drive the DEB set from both ends. I might
need to just turn down the sound volume a few settings as well. Soon after the
fridge guys rocked up. They helped me put the fridge in the shed and then they
took the old one away. They were gobsmacked by the layout. One guy
said his grandfather had a train set. If you ever need a fridge, use
Appliances Online, their delivery crew are just the best and they take the old
one away. That night we got online and had a discord chat on Marty’s
site.

The DEB set is sitting in the Loop at Cassino
The Fridge is stocked and ready for use
Friday was another day of nothingness. I packed up
what I needed to take with me for Saturday but that was it. We got online
and were talking to a few people on Discord, and then talking to more people on Adam’s Whereby site.
Saturday was our NMRA meeting day. We all ventured out
to Ipswich for the meeting. I got there early and had a pleasant walk to
the CJ Vogler & Son Hobby Shop about 400 - 500 metres away. I had a good
browse and picked up a stock of styrene at a fantastic price. While there
3 other Tuesday Nighters rocked up (Arthur, Barnacle and Kevin) and I think they all bought something at the
hobby shop as well. Back at the hall where our meeting was, people were starting
to turn up. We certainly had a big attendance. I think it must have
been above 40, and there were about half a dozen online as well. The
Ipswich Club certainly put on a great meat and salad lunch which was really appreciated
by the attendees. We had a great natter before, between and after the presentation sessions. I got there at 9:00am and I think I left just
before 5:00pm. What a day.
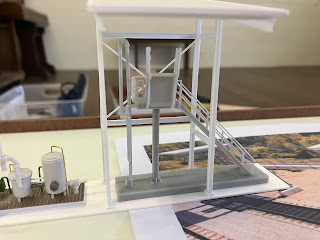
Some nice work by Garry on display
A couple of shed by Garry
Later that night we were able to join the BR guys for their
fortnightly Brew and Natter on webex. That was another good session.
My main task now is to work on two presentations for the
National NMRA magazine which all NMRA members in Australia and NZ have access to. I was asked to work on an article for this
publication. Basically they are finished, I just need a few clearances
and a review or two by some mates. Maybe mid-week these will be sent off.


