Sunday, April 6, 2025

Station Progress - Lismore and Cassino

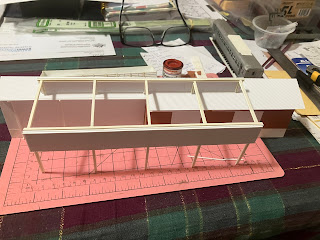
So Monday was a tidy up day.  I added a base to my platform shed for Lismore.  I also added some legs to the rear of the shed, as it hangs off the platform.  The trees were added to the area behind the platform.  I drilled 5 holes in the platform to accept the five poles for the platform awning and it was secured to the platform.

I touched up the window frames and platform facing doors in the Lismore platform shed with white paint and when the paint dried the shed was placed on the platform.

I did some experimenting by running a couple of wagons through the Lismore platform and adjusted the distance of the platform back from the track, following all this work.  The platform has had some facing added and the platform top itself was recently stained.  This area is coming along very well.

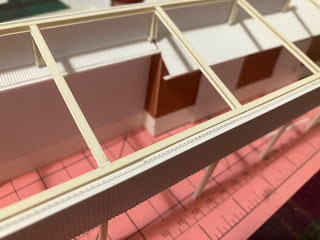
On Wednesday I started to turn my attention to the Cassino Station building.  This has been sitting in limbo for a while.  My main plan is to complete the roof of this very long structure in the next week or two.  However, I started by installing some styrene strip 0.100” x 0.100” square along the insides of all the rooms in the station building.  Some sections of wall in the station building had started to bend a bit.  So hopefully this strip will reinforce the sides, and help them to remain relatively square.  The next task was to install some solid wires through the roof structure so I can tap some LEDs into this roof top power bus in the future.  I also had a new delivery of eBay 0402 LEDs arrive on Thursday.  This power bus will provide power to LEDs under the awnings and allow them to have them controlled by fascia mounted switches.  I will also install another pair of copper lines in the roof of the refreshment room building.  As this structure too, will have working platform lights.  I also painted some other platform light poles a yellow colour.  I saw a photo of the platform lights being yellow in the early 90’s.  This is the modelling period, so I better get that correct.  These will also get wired up to a power supply under the layout in a week or two.

I have done some painting to the various sections of the station building roof.  The station building has had 4 pieces of roof painted and glued together.  I have painted the next 2 sections of roof, but not yet joined them to the first four.  I have also constructed 6 sections of roof for the refreshments room building.  These have been painted and assembled into 2 lots of 3.  I still need to build the supports to keep these sections of roof at the at correct angle.  I plan to work from both ends of the build back towards the middle as this is where the roof shape changes.  I think I should be able to have a trial fit of this over the coming week.  I have also added some fascia boards to the station building, and will need to be joined to the refreshment rooms section.  These items will then be extended to cover the full refreshment rooms area.  

This week I will need to fit the last three platform awning supports to the refreshment rooms section and also fit the building fascia which is made from scale 2” x 10” styrene.  I also need to fit the three intermediate roof supports between the building and the fascia.  I will start at the far end of the refreshment room building and work my back to the breezeway section between the refreshment room and the stations building.  This will be done with the structure sitting on the platform itself, as once I join this roof section up, the station building and refreshment rooms will not be able to be moved from the platform.  Besides having wires through the platform base for power, the roof supports are so thin they cannot support the whole station building.

On Saturday morning I went over to AMRA clubrooms for their buy and sell.  I came away with a few bargains.  I parked at PK’s place and we walked to the clubrooms together.  As my hands were getting full, I worked back to PK’s to stow my cache and had a coffee and a biscuit.  I then went back to the Buy and Sell, caught up with Arthur, and offered him a lift back to where he parked his car on the south side at Sunnybank station.  On Saturday evening, we joined the British Region and their regular Brew and Natter.  That is two hours I won't get back.

Today was fully spent running the ATLP2022 boxcar around the layout.  It left Cassino Yard and made its way to Park Road Siding.  The newsprint paper rolls it was carrying were unloaded.  It was then picked up by a local shunt train and taken to Acacia Ridge Yard.  It was here that it was bogie exchanged to narrow gauge – 12mm  3’ 6” for a trial by the Queensland Railways.  It was sent back to South Brisbane Station and shunted into a siding.  It was filled with railmotor parts and sent back to Clapham before it was shunted into Rocklea Siding.  From Rocklea Siding it was picked up and via Clapham Yard, was sent to Acacia Ridge Yard and was bogie exchanged back to the standard gauge.  It has since been sent to a siding at Acacia Ridge yard to be loaded with Queensland mangoes and is now waiting for the fruit train which is coming from South Brisbane Interstate station, and it will be picked up and taken south to Grafton Yard, before being sent onward to Flemington Markets so the Mexicans can get a great tasking and juicy mango or two in their local fruit shops. 

So this coming week I will complete the ATLP2022 moves, continue working on the station roof for Cassino, add a power bus to the refreshment room, add the LED lights, fix a loose wire for track 3 at the northern end of Clapham Yard Panel and find out why there is intermittent power to a section of narrow gauge track between Dutton Park to Park Road.  the ATLP Box car is moving on next Saturday.

Sunday, March 30, 2025

Haven't Done Scenery For a While

This week I continued work on the Old Cassino Dairy building.  Basically, I got all my scenery material out on Monday and prepared the site.  I was running out of various coloured dirts provided in various individual plastic bags for scenery.  But before old Mike passed away, he gave me a few ice-cream buckets full of various coloured dirts and sands.  I cut up some styrene to be used as simulated concrete underneath the shed awning of the Dairy building.  This styrene was painted a concrete colour that I had sitting in my paint stand.

On Tuesday I started spreading some dirts around the siding.  All the way up the headshunt, back through the Dairy siding, up until the road crossing between the Dairy and the Old Cassino Station, the dirts were scattered.  This was glued down using a pipette dribbling wet diluted PVA glue over the dirts.  The pieces of concrete around the shed awning were then glued in with PVA glue.  Basically the next step was to bring the ground level up to the required level next to the concrete pads and replace the use of ballast with dirts and grasses.  As my photos show lots of grass around this track on the prototype, I applied a couple of colours of various greens and yellow scatters to bring the dirt to life.  This was allowed to dry.  I also installed the 5 small concrete bases to go around the posts for the dairy shed awning supports.  These were also glued in.

Attention has now turned to Lismore station.  On Tuesday night I got online with a few of the Tuesday Nighters, and we were discussing the various photos of Lismore platform that I had.  I was planning to building the modern station awning at the southern end of the platform.  That was easy.  We agreed to some metrics after looking at Google Maps.  We guessed the height of the structure after viewing various angles and taking into account the other structures on the platform.  The next dilemma was the weatherboard structure next to the awning.  It looked like an out-of-shed, or other storage shed on the platform.  We guessed its dimensions, and its height.

Building the awning on Wednesday was quite straight forward.  Building the skillion roofed building took some more guesses.  Thursday was spent doing some work on some detail items for the layout.  I went looking for some more of the witches’ hats that Greg Beal 3D prints.  He does 10 for $2 for the small size.  I think he does 10 for $5 for the larger ones.  They actually come in orange, and after tidying up the flash from the print, are immediately placeable on the layout.  I then tidied up two ornate bath tubs, which Greg also 3D prints.  2 for $2.  I then tidied up his old agitator washing machine with wringer.  This is sold for $3.  These items got a short coat of appliance white on Friday in between rain showers.

As I’m working on Lismore station, I had to put in the carpark behind the platform.  I used a 1.5mm balsa base that I stained with ink pad ink and metho.  I had to mix up a new brew of stain.  I just pour in some metho and then pour in some ink pad ink.  It needs to have enough ink to make the balsa go black and not blue.  I drew up a small car park to scale on a piece of paper, and after working out how much space I had behind the platform back to the sky board, I narrowed the distance between the two rows of parking, and the whole car park could fit in.  This was transferred onto the balsa wood.  I use 0.040” x 0.010” styrene strip as the white lines in the car park.  I used 0.080” angle for the curbing.  This angle can be bent to form the various curved gutter corners in the carpark if you take it easy. The styrene is welded to the balsa by using styrene glue and soaking it.

Today, the area between the carpark and the existing scenery at Lismore was today converted from virgin baseboard into scenery.  The ground is painted a dirt colour.  Next, dirts are scattered over eth area, and then the various grass colours added.  I have also obtained about 20 trees that will eventually populate the area.  The trees will be planted next week.  Today I also painted another couple of square feet of raw baseboard around the Lismore to Murwillumbah spiral with a ground colour before further scenery work is undertaken.  I also painted up the Lismore station awning.  I also painted the roof and the skillion roofed platform building.  I have yet to paint the window white and the doors white.  These will be planted on the scene early next week.

Sunday, March 23, 2025

Old Cassino Dairy is Being Installed

On Monday I continued work on my Old Cassino Dairy building.  I added a couple of bits of styrene, so I could use a bulldog clip to join the two back buildings together.

On Tuesday we went to Kevin’s place and we had a reasonable small turn out.  Kevin continues to progress his track laying.  When Darren arrived he handed me the ALTP 2022 freight car.  The car followed me home.  See a future Blog about what happened when it got to my place.  During the week I was also doing some running of a particular train around the layout.  It started at Grafton Yard and has only moved through to Cassino Yard at this point in time.  I was also doing some enhancements to the timetable with two more Shunt Lists created and some text on some timetable cards enhanced.

Cassino Yard is chockers.

On Friday morning I added some styrene to the roof of the lean-to, so that it just plugs or clicks into place on the assembly.

The real dairy building has some large pipes above the sliding doors in the brick part of the building.  I have a piping set sitting around.  So I cut up a couple of lengths of piping from that kit and made some curved ends so that the pipes look like they do to somewhere from somewhere else.  Today while I was watching the Lions on TV, I decided to fit the roof section to the building \fascia.  I used some 0.025” phosphor bronze wire to join the over shed roof to the building rooves.  I drilled a hole up the 5 rear stirrups that support the shed roof, and threaded the 0.025” wire into these.  I then drilled similar accommodating holes in the corrugated the two building rooves so that the 0.025” wire just slips down into the roof holes.  This locks the three components together. 

There is nothing better that taking that model down to the layout and placing it on the layout.  The layout fascia was about 1cm too low to meet up with the rooves.  So I removed that 600mm length of fascia and installed it about 15mm higher.  Just like a bought one!  A quick coat of paint on both sides of the fascia to hide the old screw holes and I also did a bit more work on a small section of backboard in Old Cassino. 

The Old Cassino Dairy viewed from the other side of the tracks

A close up view of the Dairy buildings from the Goods Siding

having walked down to the far end of the Dairy Siding.  This photo is taken back towards the station.  The building needs to be settled in against the backdrop/layout fascia and the 5 posts need to put into concrete surround, so the posts are upright.  Then ballasting and ground work will occur this week.

While in the painting mindset, I gave the platform at Lismore another coat of stain.  I also gave the platform at Old Cassino a coat of stain.  My next job here is to work out what type of platform facing I need to make for Old Cassino.  I just realised that the local NMRA guys are also coming to my place in June this year.  I also have my layout opened for viewing at the 2025 Australasian NMRA Convention on a couple of days.  So I need to do a few more projects.

A view of the stained Lismore Platform, with a few locos sitting in the yard.

A second view of the stained Lismore Platform.

The platform at Old Cassino has just been stained and the background backdrop was painted black (behind the goods shed).

Sunday, March 16, 2025

Railmotor and Other Models Progress and Then the Dairy Building

I finally got to the shed today after a few days of waiting for the cyclone to come ashore and then we experienced the relentless rain.

On Monday afternoon I painted a small area under the QR HO wagon along one edge.  I used a micro brush to get access to some less than suitably painted areas between gussets and along some ridges.  Attention then turned to the QR 2050 class railmotor.  I then drilled holes on one side of the railmotor and fitted handrails to the doors.  I then painted the handrails with a micro brush and then fitted these to the railmotor.  On Tuesday, I turned the railmotor over and drilled the holes for that side’s handrails.  They were attached and the railmotor set aside.  I then painted my walkway protectors a darker grey colour, and set them aside.  I will eventually get around to fitting them.

While on Tuesday when picking up my QR QH loco, I noticed that one of the bogies had seized (did not swivel), after I painted the inside of the bogie supports a few days earlier.  The bogie clips into these bogie supports.  Whoops!  While trying to unseize it, I broke off two of the bogie side frames from that bogie.  So on Wednesday I re-glued the bogie side frames, and allowed them to dry.

On Thursday I took my QR DH down to the layout and put it on the track at Acacia Ridge Yard.  I gave it a run back and forward shunting some coal wagons.  It was struggling with 5, but ran OK with 3.  I brought it back upstairs and proceeded to add some more lead over the power bogie.  Now with this extra weight, it can easily haul 5 coal wagons back and forth on the flat.  It takes time to get mobile, but has momentum when going.

While watching some F1 practice on the TV, I was looking at the marker lights on my QR 2050 railmotor.  I added a bit of red paint around the 0402 LEDs on the rear of the railmotor and when I turned them on, they looked pretty good.  I was thinking of adding some red paint to the fibre optic outputs that I had for the front facing red marker lights.  But I cannot get a good enough brightness out of them.  I did some experiments with some more 0402 LEDs and these were also dipped in some red paint.  When lit they look reasonable.  So some work was undertaken to remove the LED controlling the fibre optics and replaced with these two 0402 LEDs for the front facing red marker lights.

I then had to get my head around adjusting the various CVs in my decoder in the railmotor.  I have decided that the following setup will be programmed:-

  • Headlight will be F0
  • Front white marker lights will be F1
  • Front red marker lights will be F2
  • The rear marker lights were removed from the F0R and setup to be controlled by F3.

I actually did a google and found an article that explained the CVs operation to me.  About 10 years ago I was all on top of this.  I had forgotten quite a lot.  So I programmed the decoder and gave it a test.  Brilliant!  All lights operated independently. 

On Saturday morning I took the railmotor to the track and tested the new LED front red marker lights.  Worked brilliantly.  That was when things went wrong.  I was looking at adding a screw through the railmotor base to the roof at the rear of the model to lock the roof on.  I had drilled a hole in the floor and while drilling a hole in the roof (with a power drill) at a very slow speed from beneath the floor, I snagged the micro wires from to the rear 0402 red LEDs.  I also ripped one of the LEDs from the rear of the railmotor, and tore through a few wires.  Bugger.  I was able to save one of the LED in the rear of the railmotor.  So I had to get another 0402 LED ready, dipped it in red paint, trimmed the length of wires attached, soldered it into the circuits and installed it in the rear of the railmotor.  Everything looks good again.  I could have done without that inconvenience.  However when I did a further test tonight, all the LED lights were turning on.  I had no idea of the cause.  The loco would not move backwards or forwards.  I put it in DC and it moved, and all the LEDs came on.  I blew on the decoder.  There had to be a small micro filament wire bridging somewhere.  I gave it another test, this time, movement came back.  All the lights individually worked.  Phew!  I could breath again.

Because I could, I did.  On Saturday afternoon while watching the Formula 1 on TV, I started to plan the construction and start the build of the Old Cassino Dairy structure over the siding for the milk wagons.  This will be in low relief.  I saw a post yesterday from Darren earlier in the day and he was putting together some Milk tank containers.  I have a few of these that I have had for some years now.  Maybe I should put mine together as well.  So two great minds doing dairy modelling. 

Today construction continued.  I am pretty happy with the result.  Ther needs to be some painting, and I will try and replicate the colours of the Old Cassino Dairy siding lean-to.  I will try the painting this week.

The Old Cassino Dairy lean-to where the milk tanks were loaded

The lean to with various roof lines visible.

The two buildings being modelled project at different widths.

The brick section has some opening doors for some sort of hose to come out and fill the tanks.  On the right is the rear of the QR 2050 railmotor.


Sunday, March 9, 2025

Rain, Rain Go Away and FO

This week started off with warnings for the upcoming Tropical Cyclone.  It was in the back of our minds all week.  On Tuesday our Tuesday night crew visited Darren’s place for the first time since he moved.  He has a nice back yard and area for his new shed.  A great get together.  I was doing some more work on my HO QR HO wagon.  I did a bit of painting of the HO wagon and the underfloor and bogies.  It came up quite well, or so I thought until I put my glasses on.

We were very lucky that the TC when it tracked north of us.  But it was eerily quiet on the Friday with the sun out.  The cyclone was about 60-70 km from our place due east.  It eventually hit the north of Brisbane in the bay islands and then it stopped in its tracks for a whole day just south of Caloundra.  It was not very windy either, but we had a few gusts.  I did some touch up painting in the sun on Friday to my HO wagon to cover up where the first coat was a bit deficient.  Didn’t that weather change!  We have just had rain after rain after rain yesterday and today.  I’m OK and I ever flood, I’d just geta ticket on Noah’s new boat.  The whole world will be in trouble.

We survived the TC coming ashore.  From Saturday morning at about 9:53am, the power went out.  It eventually came back on at 1:33am today.  The Energex website showed a huge area without power and 1800 houses, covering our place.  But just after the sunset and the wife and son went to get dinner at Hungry Jacks, they noticed some street lights on and a couple of houses with lights and power in our street.  Our neighbours across the street and next store on one side had power.  We already knew that our house was on a different circuit to both those neighbours, but we thought that they didn’t have any power due to the map.  We eventually put some milk, butter and cheese in our next door neighbours in their fridge overnight.  They had no idea that the rest of the suburb didn’t have any power.  We were bored yesterday with nothing to do.  I had no decent light for the workbench so I did not do any modelling.  I played 500 with my son.

While talking to someone online earlier in the week, I noticed that I had not installed the various handrails on the front and rear doors of my QR 2050 railmotor.  So that was put on the modelling list.  I bent them up today and will trial fit them all tomorrow and paint them when it dries out a bit.

Today I also booked my trip down to the Rosehill Exhibition in October.  There are quite a few of us on the same plane going down and back.  We are all staying at the same motels as well.  While trying to pay for my plane ticket, I kept getting an error.  I had to back out and select a dearer ticket coming back.  Then my mate Darren posts in our group chat seconds before me that he is on a seat just in front of me on the plane and paid the cheaper price.  What a B…….  That was my cheap ticket he purchased.  Anyway, I can kick him on the flight home.

Sunday, March 2, 2025

Model Building Progress

Progress this week was on three construction projects.  I was building sideframes for my QR DH.  I shortened three of them instead of making new ones.  I added the sand boxes and spray painted them black. 

The second project was continuing work on my QR 2050 railmotor.  This is where most of the work was concentrated.  It included making a step board out from both end doors.  This was made by using checker plate patterned styrene.  I have some sheets of this in styrene around and I used up way less than 1 cm x 1 cm.  My prototype photos of the railmotor showed that the small step board had a checker plate pattern, so I added one to each end of my model.  I then made some buffers.  I had to fit the buffers.  I also added air hoses, KD couplers and MU cables.  I also got around to adding an extra inline resistor to the rear marker lights.  I did the same to the front marker lights and this has reduced the light intensity of these lights.  I also did a bit of work on the front section of the roof.  There was a gap between the roof section and the front piece of styrene for the railmotor front.  So I added some extra styrene to the roof piece and then sanded it back down.  It now fits like a glove.  I also needed to adjust the roof line at the front of the roof, so more work has been undertaken here and it does look a lot better.  I made up some homemade battery boxes, added an engine and then the fuel tank, and air cylinders for the undersides.  At that time, the underside components still need to be painted.  I have been compiling photos of the bogie sideframes for the QR 2050 railmotor and I think I really need to try and get a 3D printed version, as I’m not sure I can find some plastic springs to use in scratch building the bogies for the railmotor.  I think it will be huge scratch building effort.  But I will investigate further.

The front of the railmotor with the MU cable, buffers, KD, and air hoses.  Just don't look to closely at the front.  The 3 foot rule applies here.

A side view with the underfloor detail applied.

The other side of the railmotor.

The next model that received some focus was my long ignored QR HO wagon.  I removed some styrene tie down rods and replaced these with phosphor bronze wire.  I added brake hoses, and couplers.  Under the wagon I added the various brake pipe pipework and the brake cylinder.  I added door locking bars, and door hinges and door latches.  I eventually got around to adding the uncoupler lift bars on Saturday, but I made these early on in the week.  I started making the various underfloor air tanks as my spares collection is running low.  I was able to obtain a parts layout for the HO wagon equipment from Arthur Hayes and this helped me identify and locate this equipment.  I had been going through my decal collection and I need to get some items.  I swapped some white metal bogies that I was going to use on this HO wagon, with what I had on another wagon.  The other wagon had some Wuiske bogies.  The Wuiske bogies allowed me to use a cutdown pair of Kadee #441 brake hangers for HO (16.5mm) that I narrowed to 12mm.  These fit over the Wuiske spacers and sit nicely on the bogie and makes the bogie look complete.  I couldn't use them on the white metal bogie.  Hopefully I get an extra point when I submit that model for assessment in the future.  All of these items also need to be painted.  While watching the NRL on TV today, I painted the underside of my QR QH, QR HO wagon and the QR 2050 railmotor.

The HO wagon with coupler lift var, air hoses and various detail items applied

Showing off some of the detail items.

I will need to go through a huge list of activities still to complete this HO wagon.  Then I have a second one to complete.

I glued the side frames to the QR DH bogies, two on Friday and 2 on Saturday.

I went to a local Buy and Sell this morning and that was a wasted $5 entry fee.  I had a great time talking to some mates there, but nothing in the detail range that I actually wanted to buy was there.  Looks like there is a Casula order coming this week.

Sunday, February 23, 2025

More Railmotor Work and DH Progression

This week I’ve been working on some articles.  The first two I was doing have been completed and both submitted to the relevant magazine authorities.  I then needed to update some associated photos.  I was asked by the overseas editors to provide a video on one of the topics.  Given where I installed my topic, this was a bit difficult.  I was videoing into the abyss, that is across an aisle in the shed and you are then confronted with the blurry background.  So I tried to make a white backdrop.  I enlisted the help of my apprentice but the resultant video could have been better.  I might try and re-do the video this week.  I took some more photos on Saturday morning. 

I also got around to installing the window bars on all the relevant windows on my QR 2050 class railmotor.  These were then spray painted.  That was followed by installing the marker lights – front and back on the trailer.  Then I set about installing the actual windows.  I was also working on the buffing plates on the railmotor.  These turned out quite well.

A while back I built a concertina, that is used for protesting the passengers in trailer to trailer walking.  I have no idea where I securely placed this item.  So I had to spend some time building another 2.  I think I will need another 2 or even 4, so I should strike while the iron is hot and build them now.  Today I took the railmotor back down to the test track and tested the lights.  Then I remembered that they are way too bright.  I will have to add another resistor inline to tone them down a bit.  Another job for this week.

This is a snap of a bit of the QR 2050 railmotor plan showing the concertina across the door.  When two trailer are next to each other they protect the people on the workway.

I’ve also started down the path of building some QR DH bogie sideframes.  The first I did was passable.  The next three that I built are too big between the axel boxes.  I will need to shorten this distance by about 1.5mm - 2mm.  I will have to build some more tomorrow.  The issue is I have run out of that size styrene.

The bogie sideframes on the left and the two concertina connections on the right.  The passable one is down the bottom.