Sunday, March 30, 2014

Heavy Equipment Moves into Bonalbo Ballast Siding

I had Monday off this week so I could attend my kids cross country carnival at school.  My daughter came second out of the girls and in the combined race with the boys and ended up 7th overall, so only 5 boys beat her.  That was a really great effort.  My son came equal 16th.  The event finished around lunch time, and after helping pack up and having lunch, I went home and adjourned to the shed were I met up with the fencing contractors and completed the installation of the rails for the remaining fence work around the Bonalbo Ballast Siding. 
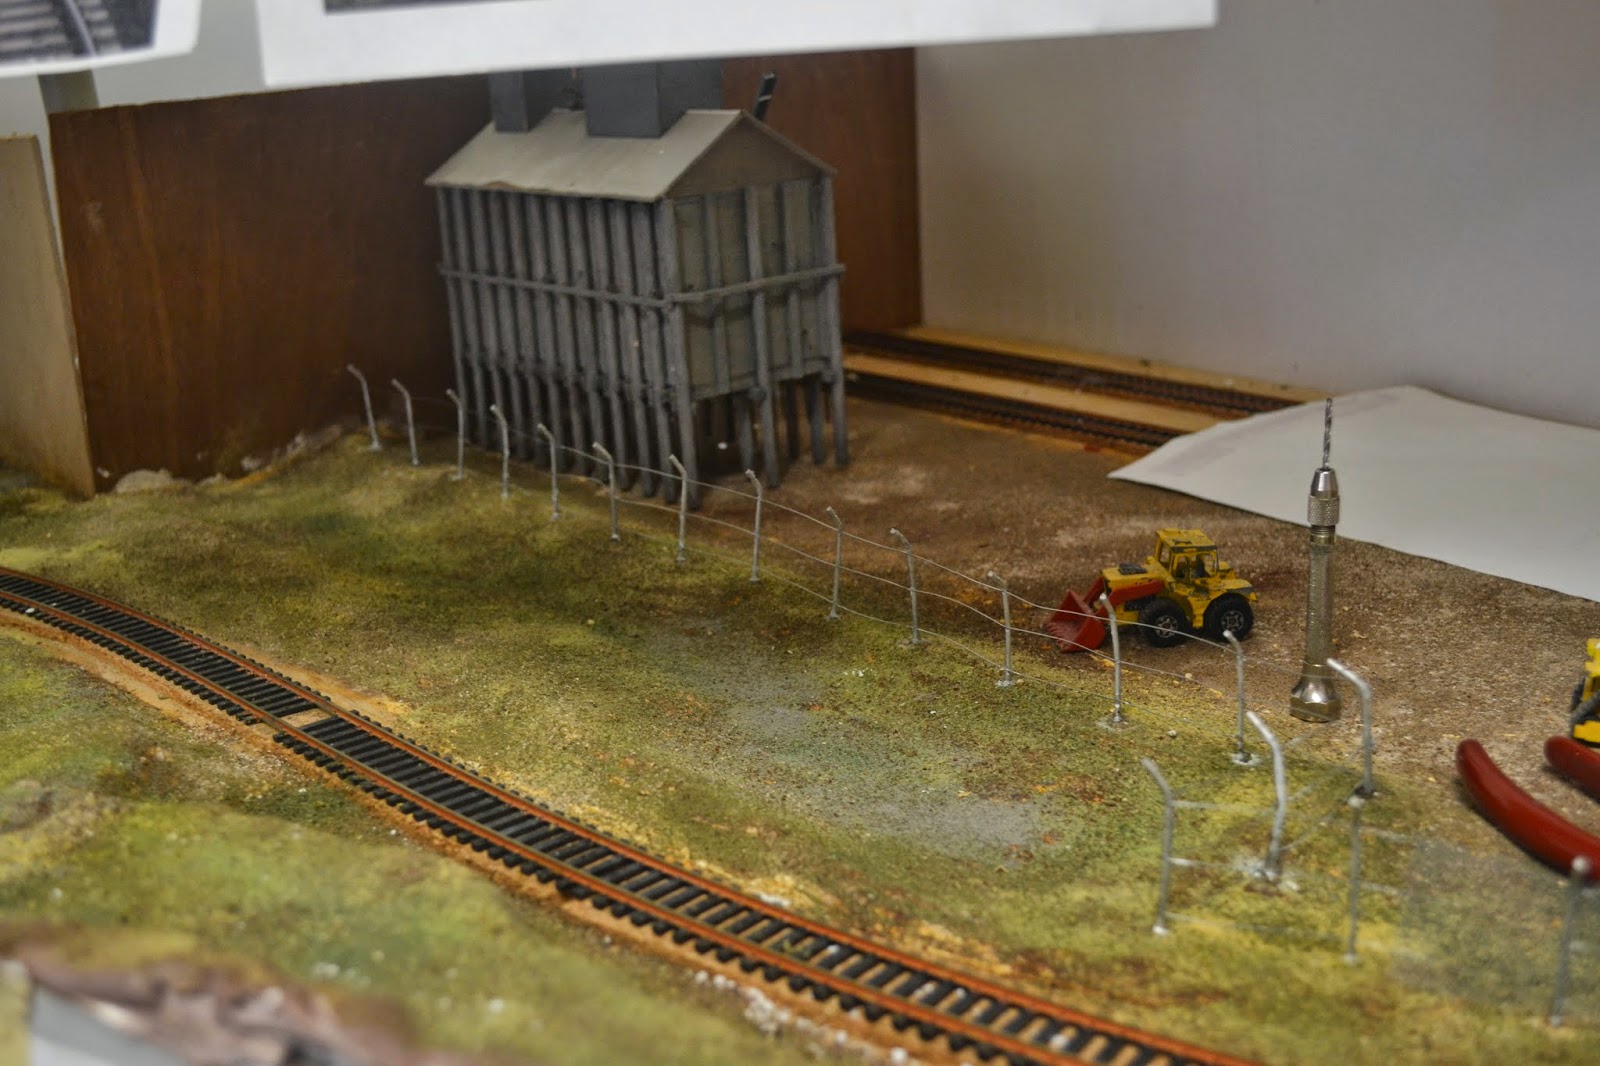
The rails can be seen in place in this photo.
 
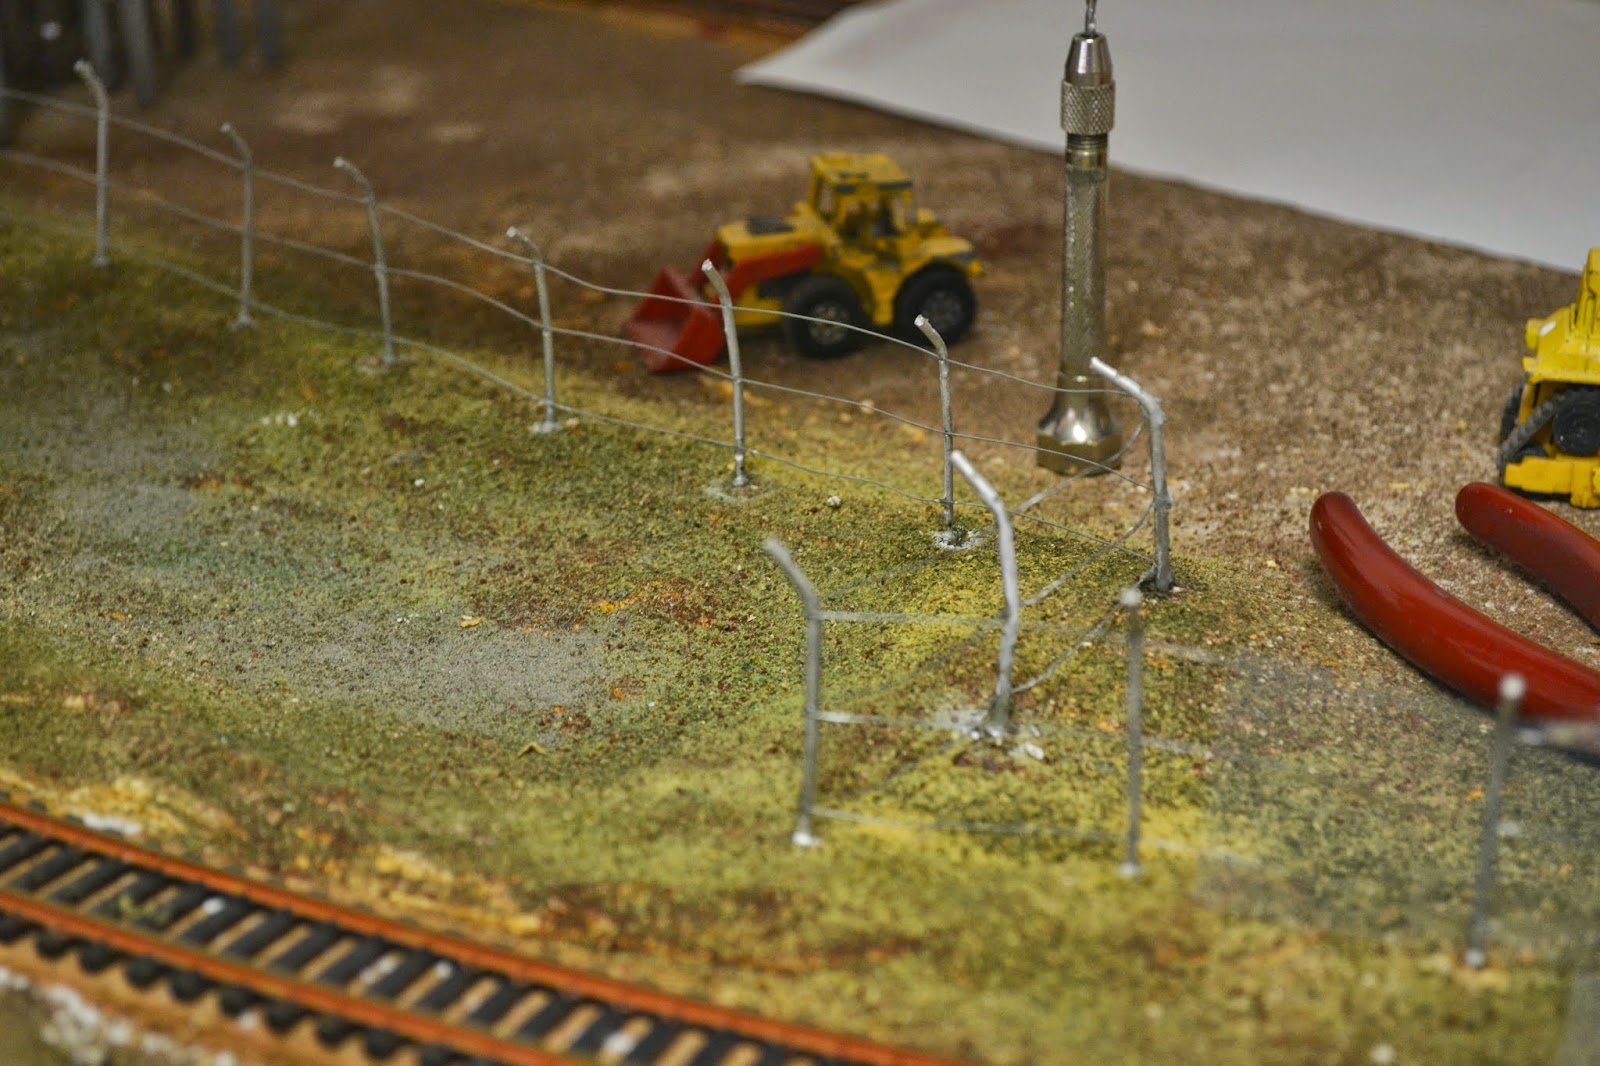
A close up of the dog leg in the fence line and the area to the left of the photo is where the small swamp will be installed.
 
On Saturday, I got out a new length of tulle and hit it with the grey primer and let it dry.  The fencing contractor then glued the wire onto the fence.  The last panel has not yet been glued on, because when I paint the backboard I did not want to get paint onto the fence so by not glueing it on, I can bend it out of the way.
 
The next task was to make up some styrofoam shapes upon which ballast would be poured to make the ballast piles within the ballast compound.  But first I had to stick the foam shapes to the ground.  White glue was used and then the piles were weighed down with anything that I could lay my hand on. 
The ballast piles are being weighed down with anything I could find.
 
These foam formers were left to dry over night.  I did come back a couple of hours later gave a squirt of diluted white glue from my scenery squirt bottle around the edges of the foam formers to assist with their sticking to the baseboard.
 
I was then in the zone and decided that I could potentially do a bit of scenicing outside the fence so I laid a small amount of ballast outside the fence line of the Ballast Siding.  About 40cm was done initially and then I did another 40 cm.  This also was left to dry overnight.  From the photo above you can see some used plastic honey jars.  I use these to store my ballast in.  You can adjust the rate of flow of the ballast out of the jar by adjusting the opening of the jar.  I think this method of application of ballast works a treat.
So today I got stuck into pouring ballast over the foam formers and then gluing it down.  I completed three piles and still have the styrofoam pile that is the furthest from the layout aisle to complete - a job for next week.  I then thought I would add a bit more ballast to either side of the length of track I ballasted yesterday outside the siding.
The three completed ballast piles are in the photo as well as the yet to completed pile.  You can also see in the left hand foreground the start of my track ballasting.
 
This is an overview of the ballast siding showing the industry as well as the external track ballasting.
 
I also then decided to add some scenicing to the area on the down slope of the southern bank of the Richmond River.  This was easy and very quick to do.
The slope leading down to the Richmond River.  I was thinking of adding s small track down to the water that leads under the first girder and into the background.
 
It was then that I thought I might add a small amount of detail between the track and ballast siding fence line.  Here is where there will be an access road right next to the track.  But further along the space gets squeezed, so the trucks doing business here will have to cross over the track from one side to the other.  There is still lots of work to do here, like a few trees, some bushes and lots of sticks and leaf litter as well as clumps of grass to provide some three-dimensional affect to the scenery.
 
I realised that I did not have any sleepers to throw around the track area at the track crossing, so I had to stain up about a dozen sleepers with ink-pad ink in a methylated spirits solution.
The track crossing is visible in this photo.  Used sleepers allow the trucks to get over the rails.
 
A close up of the ballast siding.
 
As can be seen in the above photo.  I still have to ballast the two tracks in the Ballast Siding as well as the area between and behind the tracks.  Another job for next week.
 
So the heavy equipment has moved in and the Ballast Siding is almost ready to receive its revenue train in the coming weeks.

Sunday, March 23, 2014

Fencing Contractor Moves In

On Saturday the fencing contractor moved in to the Bonalbo Ballast Siding.  He was looking at using the pieces of florist wires that comes with the 12’ factory fencing and gates kit from Sentinel - #9700, but I realised that I only had 12 pieces of wire for the rails.  That was only going to cover well less than a quarter of the fencing that needed to be done.  So I thought about checking my collection of various spools of wire.  I had some 28 gauge wire that was almost the same size as the wire in the kit.  So I cut off three lengths of wire that will cover half the fence area that needs to be built by the fencing contractor.  He was using a tube of super glue and a spray bottle filled with water.  After he get annoyed that the super glue is not holding the wire on the fence posts, he hits it with a squirt of water.  I understand that is basically the same concept as zip-kicker a commercial product that fires off the super glue almost immediately.  Nothing like a bit of science to solve your modelling problems.
 
So after the first day the contractor had laid the three rails for half the fence's length.  The contractor has also cut three more lengths of 28 gauge wire to complete the fence.  These will be applied maybe early next week.  I have Monday off to attend the School Cross Country Carnival in the morning.  I can already hear the shed calling me in the afternoon to allow the fencing contractor to finish the rails for the second half of the fence.
 
Later on Saturday afternoon I unravelled two lengths of the supplied white tulle that comes with the kit to represents the fencing wire.  I took those outside the shed and fired up the spray can of grey primer and hit the white tulle with the grey paint.  Later on I found a third length of tulle that I will need in order to complete the fence, but by that time I couldn’t be bothered to get the spray can back out again after the previous wash up and pack up.
 
Today after attending the Christening of one of my great nieces and one of my great nephews and having a great time catching up with all my nieces and nephews and their kids and their friends, I decided to hit the shed around 4:30pm this arvo upon arriving home.  I decided that the fencing contractor needed to install a few rolls of fencing wire around about 7/8th of the fence that has already been completed with rails.  To attach the wire to the rails I was using white glue.  It dries clear (that's an advantage) and I can probably easily be remove it if I had to.  Also I think it can get quite tacky when left to dry slightly before adding the wire (Tulle) and this makes it quite easy to use for attaching the wire to the fence rails.
 
Here are some photos of the fencing contactor's efforts.  His services are quite cheap.  I didn't pay him!
The fence near the railway gate.  The rails of the first panel has not been attached to the first post yet and the wire is also yet to be attached to the rails on this panel.  This is because I do not yet decide how I will mount the swinging gates.

A view down along the fence line.  You can still see the white glue in some places on the fence wire as it has not yet dried.  Some of the tools of the trade as used by the fencing contractor can be seen behind the fence.

A close up view of the fence as the fencing wire dries on the rails.

Sunday, March 16, 2014

Bonalbo Ballast Siding Scenicing

Today I got down to the shed and spread a base covering of dirt around inside the Bonalbo Ballast Siding.  I then put a bit of greenery around just outside the fence line.  I intend to make the area just outside the line a bit of a swampy area.  There might be some long reeds and a few ducks and water birds around as well.  There might be a couple of kids also mucking around in this area.  That was all I intended to do today.  I went up stairs and then decided to go back down to the shed and watch the Grand Prix there.  So I then decided to drill the holes for the placing of the 12 foot chain wire fence.
 
This photo shows the depression area that will become a small swamp in the area between the fence and the track in the distance.  The building is one of the many created by Mike Boyde.  It does not really fit in but I just really need to find a place on the layout to locate this as a tribute to Mike's friendship and inspiration over the years.  If it doesn't go here, it might do in the area around Kyogle.

Over the next few weeks, I will have to try and find a few servo motors on Ebay that I might be able to mount under the layout and attach so the gates can actuate when a ballast trains needs to shunt the sidings.
 
I still have some more scenicing to do within the compound, between the tracks, and on the other side of the tracks next to the wall.  I will then create a few ballast piles so the heavy equipment will be able to load the ballast wagons from.  I also have to add the rails to the fence and then follow up with the wire mesh and cotton to simular the barbed wire on the top of the fence.
 
Here are some photos of the Bonalbo Ballast Sidings.
This shot shows the depth of the Bonalbo Ballast Siding complex.

The gates for the entry into the area are just sitting there at the moment.  The catch point are just inside the gates.

This shows the overall the picture of the Bonalbo Ballast Siding complex.  The fence on the right was just removed from an old module from the Old Cassino layout and placed straight onto the layout.  It fits just right.


I will continue working in this area over the next few weekends.

Sunday, March 9, 2014

Scenery Around the Bruxner Highway

This afternoon I ventured down to the shed to complete the scenicing of the area on the left rear of the Bruxner Highway  That was quite an easy job.  I sprayed on the white glue and I followed that up with a covering of various types of dirt and sand.  After more white glue, this was then covered by the yellows and greens of the grasses.
The area behind the roadway line and to the left of the road was sceniced this afternoon.
 
I then turned my attention to the ballast siding area.  I removed the various pieces of wood that were holding down the styrofoam that I glued in place last weekend.  I then mixed up two mixes of plaster and applied that over the styrofoam and tried to contour it in so it did not look like flat earth.  Once the plaster was dry I then painted the plaster and the baseboard around the Bonalbo Ballast Siding area – raw sienna. 

The Bonalbo Ballast Siding is the next area to be worked on.  The base has been coloured and hopefully will be sceniced next weekend.
 
Next week I will have to cover this area with dirts and scatters to represent the area where the various ballast trains are loaded.  Following that I will install a few relatively small ballast heaps with an end loader or two positioned around.  Then I will start work on the fence that will surround the business.  I think I will leave the gates across the rail entry until some time in the future after I have worked out how to make then operate.

Sunday, March 2, 2014

I’m Still Working on the Roadway

This weekend I have been getting stuck into and almost completing the Bruxner Highway level crossing.  Yesterday I mixed up a couple of batches of plaster and attacked the layout.  I poured these to the front right of the road.  Then to the rear right of the road behind the track.  I then poured another batch to the front left of the road.    
Photo of the level crossing with the first few batches of plaster already installed.
 
I then masked up a few holes in the baseboard to the rear left of the track.  This is where  various pieces of wood join and there are slight holes in the baseboard and wet plaster will find its way through the holes.  So I masking taped over the holes and I mixed up some thick plaster and this area and let it dry in preparation for today.  Below this area of the layout are 7 return loops where I stage my trains, sometimes two or three in each one.  When the plaster was dry I got out my raw sienna colour and gave this whole area a base coat.

The base undercoat of raw sienna has been applied.

Today I went to the shed and masked up the road way and the track itself so I did not get them covered in my scattering procedure.
 
The road and track are now safe from my stuff ups.
 
I got the white glue out and mixed up a week batch in the spray bottle and covered the right hand side of the road and used my collection of coloured dirts and then covered this off with coloured scatters.
So here is the photo after I spread the scatter around.

The base coat of scatter has been applied.

The area with the road protection removed.

I then after lunch decided to spend some more time progressing the area.  So I spread some more plaster around the rear left of the road.  After it had dried a bit, I spread a batch of raw sienna paint around over the plaster had a review of my work.

The left rear of the area has been painted.  A couple of detail items have been spread around for later installation.

I then went to a module I have underneath my layout from the original Cassino L ayout that used to exist inside the house in my previous train room, which is now the kid’s playroom.  This small module had some signs still in place that I previously made for it.  So I removed them and I have laid these around on the Bruxner Highway section and these will be eventually installed onto the Bruxner Highway section as it progresses in detail.
 
A close up of the level crossing.  The railway crossing signs and a few other bits in pieces are read for permanent installation. 
 
I still have some work to do with dirt and scatters for the rear left of the crossing.  That is the next job.  But I have started preparing for the following job which will be the Bonalbo Ballast Siding.  I have cleared it out a bit and installed some styrofoam which I will cover in plaster so I don’t get a flat earth area.  I will have some contours in this area.  At this stage the styrofoam is being held down with pieces of wood until the glue dries.  The ballast siding will eventually be surrounded by a 10 foot chain wire fence with barbed wire on the top.  I also plan to have some working gates controlled via two servo motors under the layout.  Again a project for quite some time into the future.

The semi cleared Bonalbo Ballast Siding.  The wood is holding down the styrofoam while the glue dries.
 
I'm not sure how much I will get done next week as it is our Club Meeting day Saturday and a school working bee on the Sunday.